
イントロダクション
IntelliJ IDEAで作成したプロジェクトをGITへ登録する手順です。
Introduction
How to push own project in IntelliJ to GIT.
手順(How to)
(1)ローカルリポジトリの作成(Create local Repository on pc)
1.プロジェクトを開く(Open your project)
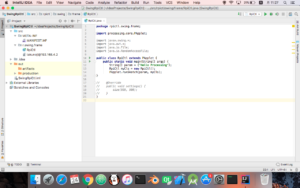
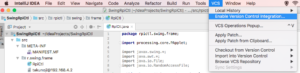
2.メインメニューからVCS→Version Control Integrationを選択する(select VCN → Version Control Integration)
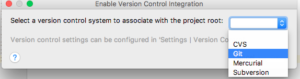
3.Gitを選択する(select "Git")
4.コマンドボタン+9(⌘9)を押下→「Unversioned Files」を右クリック→ローカルリポジトリにファイルを追加する (push (⌘9) →right click on "Unversioned Files" → Add files to Git repository
※メニューからも開けます(you can find from menu)

- Open the project that you want to put under Git.
- From the main menu, choose VCS | Enable Version Control Integration.
- In the dialog that opens, select Git from the drop-down list and click OK.
- push (⌘9) → right click "Unversioned Files" and Add files to local repository.
(2) Gitリポジトリ(リモートリポジトリ)にプッシュする
1.登録するリモートリポジトリを作成する
Git Hubなどでリポジトリを作成する
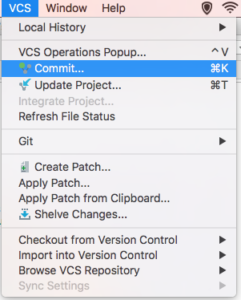
2.メインメニューから「VCS」をクリックする
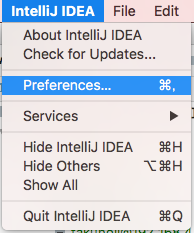
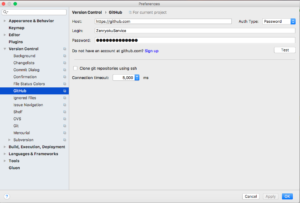
2.プロジェクトの設定を開く
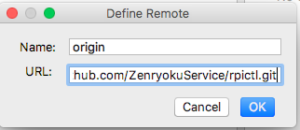
3.接続するGitリポジトリのURLを設定する
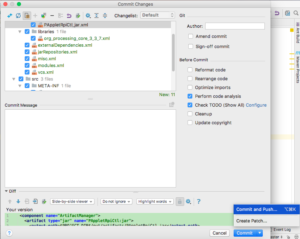
4.コミットとプッシュを行う
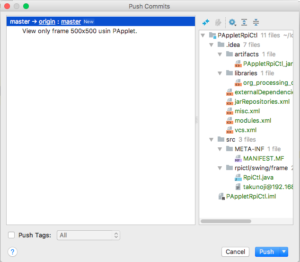
5.途中でURLを聞かれるので作成したGitリポジトリのURLを指定する
6.登録できた事を確認する
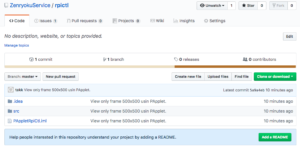
ちなみに自分の作成したGitリポジトリはこちらです。