第11章 - ライト
この章では、3D ゲーム エンジンにライトを追加する方法を学習します。複雑さを除けば、膨大な量のコンピューター リソースが必要になるため、物理的に完全なライト モデルは実装しません。代わりに、適切な結果を提供する近似を実装します。フォン シェーディング (Bui Tuong Phong によって開発された) という名前のアルゴリズムを使用します。指摘すべきもう 1 つの重要な点は、ライトのみをモデル化し、それらのライトによって生成されるシャドウをモデル化しないことです (これは別の章で行います)。
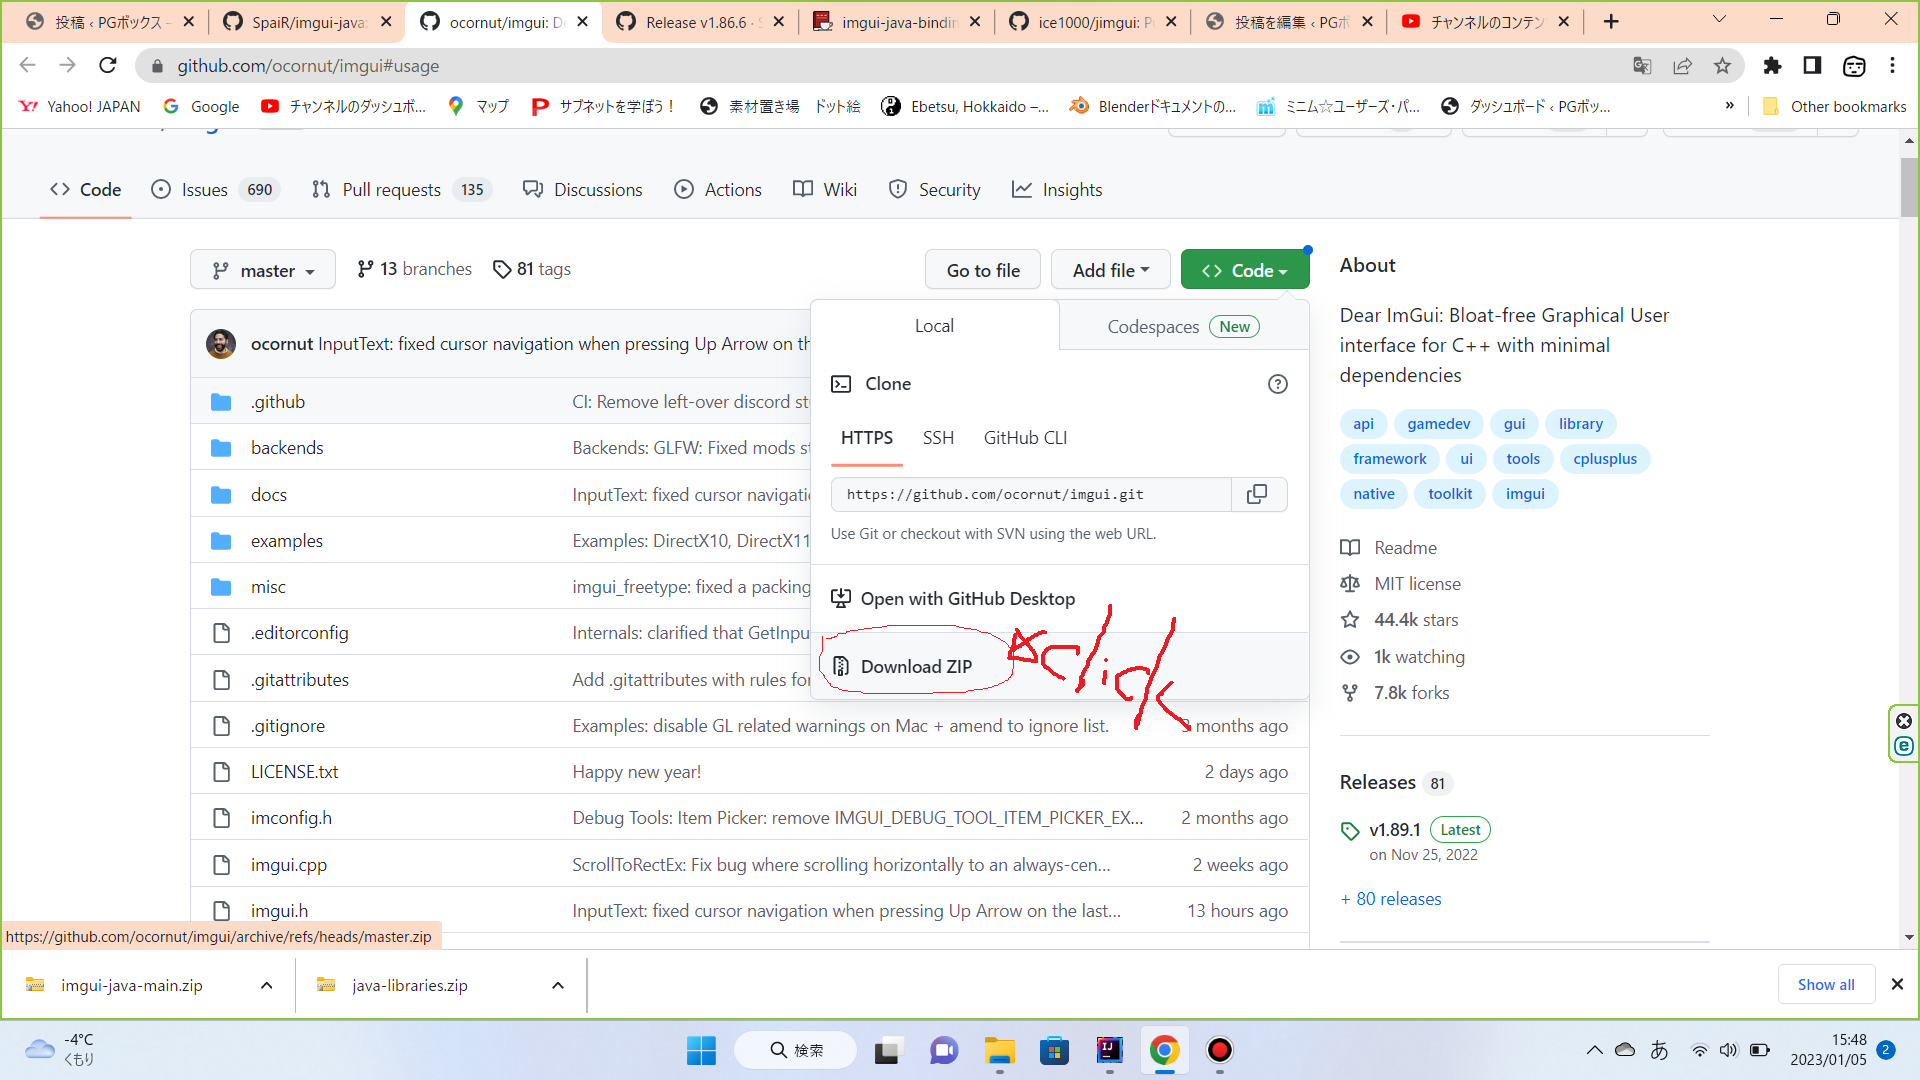
参照するドキュメントとプログラムソースへのリンクは以下になります。
ライトの考え方(理論編)
はじめに、ライトの考え方に関しての記述があり、その後実装に関しての記述があります。
そして、「モデル読み込みの変更」の項目部分がとても重要に思えます。大まかに次のような変更を行っています。
ライトクラスの作成=ライトのモデル(データクラス)を作成する
Sceneクラスにライトクラスを格納する
ModelLoader(3DModelの読み込みクラス)の変更
上記の変更に伴い修正する必要があるクラスの修正
ImGuiに関して
このサンプルコードでは、ImGuiの実装部分はライトコントロールクラスに実装されています。
class XXX implements IGuiInstanceそして、IAppLogicインターフェースの実装クラス=Mainクラスで入力があったときに何かしらの処理をする予定だと思いますが、このサンプルでは何も実装していませんでした。
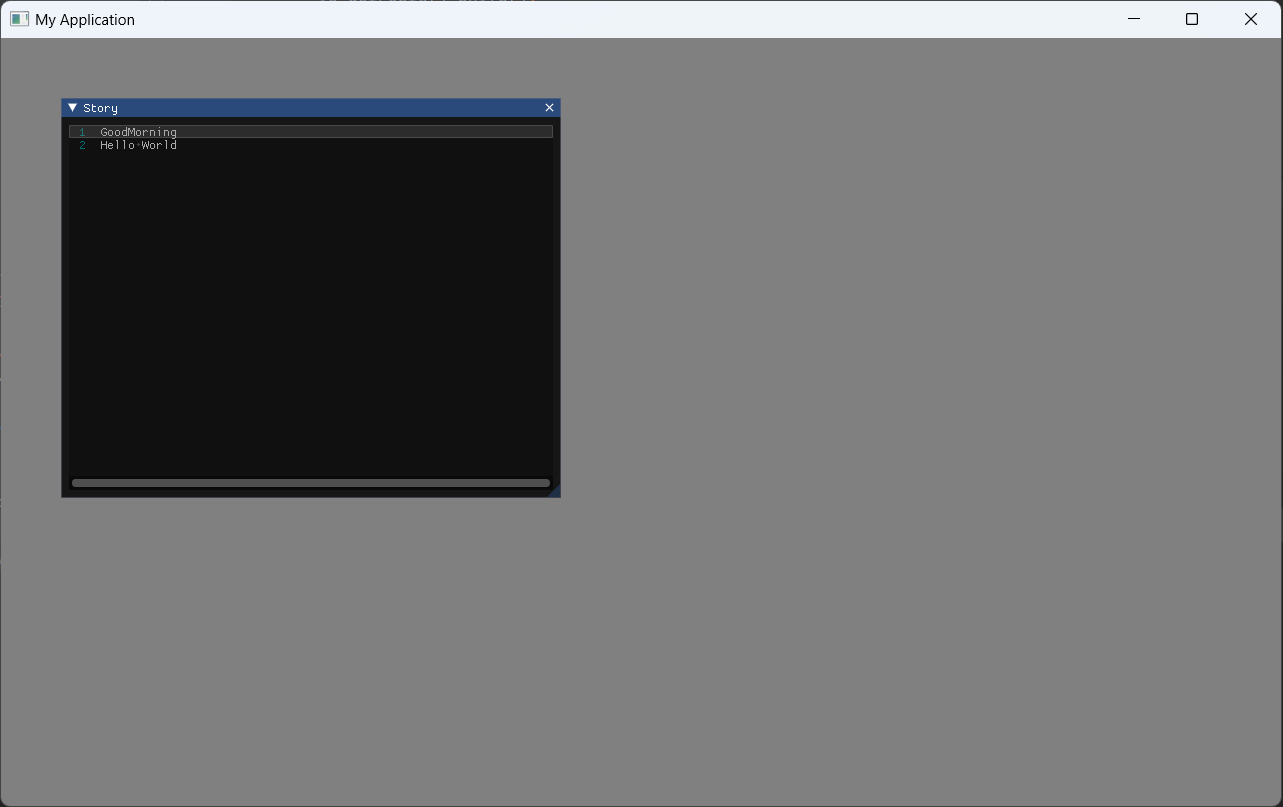
サンプルプログラムの実行結果
VIDEO
いくつかの概念
始める前に、いくつかのライト タイプを定義しましょう。
・ポイント ライト: このタイプのライトは、空間内の 1 点から全方向に均一に放出される光源をモデル化します。
・スポット ライト: このタイプのライトは、空間内の 1 点から放射される光源をモデル化しますが、すべての方向に放射するのではなく、円錐に制限されます。
・指向性ライト: このタイプのライトは、太陽から受け取る光をモデル化します。3D 空間内のすべてのオブジェクトは、特定の方向から来る平行* ・光線ライトに当てられます。オブジェクトが近くにあるか遠くにあるかに関係なく、すべてのレイ ライトは同じ角度でオブジェクトに影響を与えます。
・環境光: このタイプの光は、空間のあらゆる場所から来て、すべてのオブジェクトを同じように照らします。
したがって、ライトをモデル化するには、ライトのタイプ、その位置、および色などのその他のパラメータを考慮する必要があります。もちろん、レイ ライトの影響を受けたオブジェクトが光を吸収および反射する方法も考慮する必要があります。
フォン シェーディング アルゴリズムは、モデルの各ポイント、つまりすべての頂点の光の効果をモデル化します。これがローカル イルミネーション シミュレーションと呼ばれる理由であり、このアルゴリズムが影を計算しない理由です。頂点が光をブロックするオブジェクトの背後にあるかどうかを考慮せずに、すべての頂点に適用される光を計算するだけです。 . 後の章でこの欠点を克服します。しかし、そのため、非常に優れた効果を提供するシンプルで高速なアルゴリズムです。ここでは、材料を深く考慮しない単純化したバージョンを使用します。
Phong アルゴリズムは、ライティングの 3 つのコンポーネントを考慮します。
3 つのコンポーネント
・環境光: どこからでも来る光をモデル化します。これは、光が当たっていない領域を (必要な強度で) 照らすのに役立ちます。これは背景光のようなものです。
・拡散反射率: 光源に面している表面がより明るいことを考慮します。
・鏡面反射率: 研磨面または金属面で光がどのように反射するかをモデル化します。
最後に取得したいのは、フラグメントに割り当てられた色を掛けて、受ける光に応じてその色を明るくまたは暗く設定する係数です。コンポーネントに名前を付けましょう
つけた名前
A: アンビエント
D: 拡散反射光
S: スペキュラ
実際、これらのコンポーネントは色であり、各光コンポーネントが寄与する色コンポーネントです。これは、光コンポーネントがある程度の強度を提供するだけでなく、モデルの色を変更できるという事実によるものです。フラグメント シェーダーでは、その明るい色を元のフラグメント カラー (テクスチャまたはベース カラーから取得) で乗算するだけです。
アンビエント、ディフューズ、スペキュラー コンポーネントで使用される、同じマテリアルに異なる色を割り当てることもできます。したがって、これらのコンポーネントは、マテリアルに関連付けられた色によって調整されます。マテリアルにテクスチャがある場合は、コンポーネントごとに 1 つのテクスチャを使用します。
したがって、非テクスチャ マテリアルの最終的な色は次のようになります。
L
=
A
∗
anbientColor
+
D
∗
diffuseColor
+
S
∗
specularColor
テクスチャ マテリアルの最終的な色は次のようになります。
L
=
A
∗
textureColor
+
D
∗
textureColor
+
S
∗
textureColor
法線
法線は、ライトを操作するときの ket 要素です。まず定義しましょう。平面の法線は、長さが 1 に等しい平面に垂直なベクトルです。
上の図からわかるように、平面には 2 つの法線があります。どちらを使用する必要がありますか? 3D グラフィックスの法線は照明に使用されるため、光源に向けられた法線を選択する必要があります。言い換えれば、モデルの外面から突き出ている法線を選択する必要があります。
3D モデルがある場合、ポリゴン、この場合は三角形で構成されます。各三角形は 3 つの頂点で構成されます。三角形の法線ベクトルは、長さが 1 に等しい三角形の表面に垂直なベクトルになります。
頂点法線は特定の頂点に関連付けられており、周囲の三角形の法線の組み合わせです (もちろん、その長さは 1 です)。ここでは、3D メッシュの頂点モデルを確認できます (ウィキペディアから取得) 。
拡散反射率
拡散反射率について話しましょう。これは、光源に対して垂直に面している面が、より間接的な角度で光を受けている面よりも明るく見えるという事実をモデル化しています。これらのオブジェクトはより多くの光を受け取り、光の密度 (このように呼びましょう) が高くなります。
しかし、これをどのように計算するのでしょうか。ここで、まず法線の使用を開始します。前の図の 3 点の法線を描きましょう。ご覧のとおり、各ポイントの法線は、各ポイントの接平面に垂直なベクトルになります。光源から来る光線を描く代わりに、各点から光の点へのベクトルを描きます (つまり、反対方向)。
ご覧のとおり、に関連付けられている法線
、名前付き
P1, N1
等しい角度を持つ
P1, 0
光源を指すベクトルを使用します。その表面は光源に対して垂直であり、一番明るいポイントになります。
P1
関連付けられている法線
P2
、名前付き
N2
、光源を指すベクトルと約 30 度の角度を持っているため、より暗い黄褐色になるはずです。
P1, P3
. 最後に、関連付けられている法線
P3
、名前付き
N3
も光源を指すベクトルに平行ですが、2 つのベクトルは反対方向です。
P3
は、光源を指すベクトルと 180 度の角度を持ち、まったく光を取得しないはずです。
内積という算術演算
内積という算術演算を使用できます。この操作は 2 つのベクトルを取り、それらの間の角度が鋭角の場合は正の数値 (スカラー) を生成し、それらの間の角度が広い場合は負の数値を生成します。両方のベクトルが正規化されている場合、つまり両方の長さが 1 の場合、内積は次のようになります。
-1 と 1
両方のベクトルがまったく同じ方向 (角度) を向いている場合、内積は 1 になります。
v1 と v2
、そしてみましょう
alpha
それらの間の角度になります。内積は次の式で定義されます。
両方のベクトルが正規化されている場合、それらの長さ、モジュールは 1 に等しいため、内積はそれらの間の角度の余弦に等しくなります。この操作を使用して、拡散反射率コンポーネントを計算します。
したがって、光源を指すベクトルを計算する必要があります。これをどのように行うのですか?各点の位置 (頂点の位置) と光源の位置があります。まず、両方の座標が同じ座標空間にある必要があります。簡単にするために、それらが両方ともワールド座標空間にあると仮定しましょう。これらの位置は、頂点位置 ($$VP$$) と光源 ($$VS$$) を指すベクトルの座標です。次の図に示します。
差し引くと
V
探しているベクトルを取得します
L
これで、光源を指すベクトルと法線の間の内積を計算できます。この積は、表面の明るさをモデル化するためにその関係を最初に提案した Johann Lambert にちなんで、Lambert 項と呼ばれます。
計算方法をまとめてみます。次の変数を定義します。
計算方法をまとめ
vPos : モデル ビュー空間座標での頂点の位置。
lPos : ビュー空間座標でのライトの位置。
intensity : 光の強度 (0 から 1)。
lColor : 光の色。
normal : 頂点法線。
まず、現在の位置から光源を指すベクトルを計算する必要があります。
toLightDirection
=
lPos
-
vPos
. その操作の結果は正規化する必要があります。
次に、拡散係数 (スカラー) を計算する必要があります。
defuseFuctor
=
normal
-
toLightDirection
2 つのベクトル間の内積として計算されます。-1と1両方のベクトルを正規化する必要があります。色は間にある必要があります0と1
color
=
diffuseColor
*
lColor
*
diffuseColor
*
intensity
鏡面成分
鏡面反射光コンポーネントを検討する前に、まず光がどのように反射されるかを調べる必要があります。光が表面に当たると、その一部が吸収され、他の部分が反射されます。物理の授業で思い出したように、反射とは、光が物体から跳ね返ることです。
もちろん、表面は完全に磨かれているわけではなく、近くで見ると多くの欠陥が見られます。それに加えて、多くのレイ ライト (実際にはフォトン) があり、そのサーフェスに影響を与え、さまざまな角度で反射します。したがって、私たちが見ているのは、表面から反射された光線のようなものです。つまり、光は表面に当たると拡散します。これが、前に説明した拡散コンポーネントです。
しかし、金属などの研磨された表面に光が当たると、光の拡散が低下し、その表面に当たるとほとんどが反対方向に反射されます。
これはスペキュラ コンポーネントがモデル化するものであり、マテリアルの特性に依存します。鏡面反射率に関しては、カメラが適切な位置にある場合、つまり反射光が放出される領域にある場合にのみ、反射光が見えることに注意することが重要です。
鏡面反射の背後にあるメカニズムが説明されたので、その成分を計算する準備が整いました。まず、光源から頂点を指すベクトルが必要です。ディフューズ コンポーネントを計算していたとき、正反対の、光源を指すベクトルを計算しました。toLightDirection ですので、次のように計算してみましょう。
fromLightDirection
=
-(toLightDirection)
次に、衝撃による反射光を計算する必要があります。fromLightDirection
reflectedLight
=
reflect(toLightSource, normal)
カメラを指すベクトルも必要です。名前を付けましょうcameraDirection
cameraDirection
=
cameraPos - vPos
. カメラ位置ベクトルと頂点位置は同じ座標系にある必要があり、結果のベクトルを正規化する必要があります。次の図は、これまでに計算した主なコンポーネントをスケッチしたものです。
次に、私たちが見る光の強度を計算する必要があります。specularFactor cameraDirection reflectedLight
specularFactor
=
cameraDirection - reflectedLight
. この値が間にあることのみが必要です0と1specularFactor という名前のパラメーターにspecularPower
specularFactor
=
specularFactor
specularPower
最後に、マテリアルの反射率をモデル化する必要があります。これは、光が反射した場合の強度も変調します。これは、reflectance という名前の別のパラメーターで行われます。したがって、鏡面反射光コンポーネントの色は次のようになります。
specularColor
*
lColor
*
refrectance
*
specularFactor
*
intensity
減衰
これで、アンビエント ライトを使用してポイント ライトをモデル化するのに役立つ 3 つのコンポーネントを計算する方法がわかりました。しかし、オブジェクトが反射する光は光源からの距離に依存しないため、ライト モデルはまだ完全ではありません。つまり、光の減衰をシミュレートする必要があります。
減衰は、距離と光の関数です。光の強さは距離の二乗に反比例します。光はそのエネルギーを球の表面に沿って伝搬し、その半径は光が移動した距離と同じであり、球の表面はその半径の 2 乗に比例するため、この事実は簡単に視覚化できます。減衰係数は次の式で計算できます。
1.0
/
(atConstant
+
atLinar
*
dist
+
atExponent
*
dist
2
減衰をシミュレートするには、その減衰係数を最終的な色で乗算するだけです。
指向性ライト
指向性照明は、すべて同じ方向から来る平行光線によってすべてのオブジェクトに当たります。太陽のように遠くにあるが強度の高い光源をモデル化します。
ディレクショナル ライトのもう 1 つの特徴は、減衰の影響を受けないことです。太陽光についてもう一度考えてみてください。太陽光線が当たったすべてのオブジェクトは、同じ強度で照らされます。太陽からの距離が非常に大きいため、オブジェクトの位置は関係ありません。実際、ディレクショナル ライトは無限遠に配置された光源としてモデル化されており、減衰の影響を受けた場合、どのオブジェクトにも影響しません (その色の寄与は0)。
スポットライト
ここで、ポイント ライトに非常に似ているスポット ライトを実装しますが、放射されるライトは 3D コーンに制限されます。焦点から出る光、またはすべての方向に放射しないその他の光源をモデル化します。スポット ライトはポイント ライトと同じアトリビュートを持ちますが、円錐角度と円錐方向という 2 つの新しいパラメータが追加されています。
スポット ライトの影響は、いくつかの例外を除いて、ポイント ライトと同じ方法で計算されます。頂点位置から光源を指すベクトルがライト コーン内に含まれないポイントは、ポイント ライトの影響を受けません。
光円錐の内側にあるかどうかをどのように計算しますか? 光源からのベクトルとコーン方向ベクトル (どちらも正規化されています) の間で内積を再度行う必要があります。
間の内積:LとCベクトルは次の通りです。
L
→
⋅
C
→
=
|
L
→
|
⋅
|
C
→
|
⋅
C
o
s
(
α
)
. スポット ライトの定義でカットオフ角度のコサインを格納すると、内積がその値よりも大きい場合、それがライト コーンの内側にあることがわかります (コサイン グラフを思い出してください。α
1
−
(
1
−
C
o
s
(
α
)
)
/
(
1
−
C
o
s
(
c
u
t
O
f
f
A
n
g
l
e
)
(フラグメント シェーダーでは角度ではなく、カットオフ角度のコサインを使用します。上記の式が 0 から 1 までの値を生成することを確認できます。角度がカットオフ角度と等しい場合は 0、角度が等しい場合は 1 です。 0)。
ライト クラスの実装
モデル というのはここでは、GetterとSetterを持っているデータクラス のことを指していると思ってよさそうです。
データクラスに関して
フィールド変数とGetter, Setterを持ったクラスは具体的に次のようなものです。
public class Body {
    /** 整数で身長を表す */
    private int tall;
    /** Getter */
    public int getTall() { return tall;}
    /** Setter */
    public void setTall(int tall) {this.tall = tall}
}
PointLightクラス
まず、さまざまなタイプのライトをモデル化する一連のクラスを作成することから始めましょう。ポイント ライトをモデル化するクラスから始めます。
package org.lwjglb.engine.scene.lights;

import org.joml.Vector3f;

public class PointLight {

    private Attenuation attenuation;
    private Vector3f color;
    private float intensity;
    private Vector3f position;

    public PointLight(Vector3f color, Vector3f position, float intensity) {
        attenuation = new Attenuation(0, 0, 1);
        this.color = color;
        this.position = position;
        this.intensity = intensity;
    }

    public Attenuation getAttenuation() {
        return attenuation;
    }

    public Vector3f getColor() {
        return color;
    }

    public float getIntensity() {
        return intensity;
    }

    public Vector3f getPosition() {
        return position;
    }

    public void setAttenuation(Attenuation attenuation) {
        this.attenuation = attenuation;
    }

    public void setColor(Vector3f color) {
        this.color = color;
    }

    public void setColor(float r, float g, float b) {
        color.set(r, g, b);
    }

    public void setIntensity(float intensity) {
        this.intensity = intensity;
    }

    public void setPosition(float x, float y, float z) {
        position.set(x, y, z);
    }

    public static class Attenuation {

        private float constant;
        private float exponent;
        private float linear;

        public Attenuation(float constant, float linear, float exponent) {
            this.constant = constant;
            this.linear = linear;
            this.exponent = exponent;
        }

        public float getConstant() {
            return constant;
        }

        public float getExponent() {
            return exponent;
        }

        public float getLinear() {
            return linear;
        }

        public void setConstant(float constant) {
            this.constant = constant;
        }

        public void setExponent(float exponent) {
            this.exponent = exponent;
        }

        public void setLinear(float linear) {
            this.linear = linear;
        }
    }
}
ご覧のとおり、ポイント ライトは、色、強度、位置、および減衰モデルによって定義されます。
AmbientLightクラス
package org.lwjglb.engine.scene.lights;

import org.joml.Vector3f;

public class AmbientLight {

    private Vector3f color;

    private float intensity;

    public AmbientLight(float intensity, Vector3f color) {
        this.intensity = intensity;
        this.color = color;
    }

    public AmbientLight() {
        this(1.0f, new Vector3f(1.0f, 1.0f, 1.0f));
    }

    public Vector3f getColor() {
        return color;
    }

    public float getIntensity() {
        return intensity;
    }

    public void setColor(Vector3f color) {
        this.color = color;
    }

    public void setColor(float r, float g, float b) {
        color.set(r, g, b);
    }

    public void setIntensity(float intensity) {
        this.intensity = intensity;
    }
}
DirLightクラス
指向性ライトは次のように定義されます。
package org.lwjglb.engine.scene.lights;

import org.joml.Vector3f;

public class DirLight {

    private Vector3f color;

    private Vector3f direction;

    private float intensity;

    public DirLight(Vector3f color, Vector3f direction, float intensity) {
        this.color = color;
        this.direction = direction;
        this.intensity = intensity;
    }

    public Vector3f getColor() {
        return color;
    }

    public Vector3f getDirection() {
        return direction;
    }

    public float getIntensity() {
        return intensity;
    }

    public void setColor(Vector3f color) {
        this.color = color;
    }

    public void setColor(float r, float g, float b) {
        color.set(r, g, b);
    }

    public void setDirection(Vector3f direction) {
        this.direction = direction;
    }

    public void setIntensity(float intensity) {
        this.intensity = intensity;
    }

    public void setPosition(float x, float y, float z) {
        direction.set(x, y, z);
    }
}
SpotLightクラス
最後に、スポット ライトには、ポイント ライト リファレンスとライト コーン パラメータが含まれます。
package org.lwjglb.engine.scene.lights;

import org.joml.Vector3f;

public class SpotLight {

    private Vector3f coneDirection;
    private float cutOff;
    private float cutOffAngle;
    private PointLight pointLight;

    public SpotLight(PointLight pointLight, Vector3f coneDirection, float cutOffAngle) {
        this.pointLight = pointLight;
        this.coneDirection = coneDirection;
        this.cutOffAngle = cutOffAngle;
        setCutOffAngle(cutOffAngle);
    }

    public Vector3f getConeDirection() {
        return coneDirection;
    }

    public float getCutOff() {
        return cutOff;
    }

    public float getCutOffAngle() {
        return cutOffAngle;
    }

    public PointLight getPointLight() {
        return pointLight;
    }

    public void setConeDirection(float x, float y, float z) {
        coneDirection.set(x, y, z);
    }

    public void setConeDirection(Vector3f coneDirection) {
        this.coneDirection = coneDirection;
    }

    public final void setCutOffAngle(float cutOffAngle) {
        this.cutOffAngle = cutOffAngle;
        cutOff = (float) Math.cos(Math.toRadians(cutOffAngle));
    }

    public void setPointLight(PointLight pointLight) {
        this.pointLight = pointLight;
    }
}
SceneLightsクラス
すべてのライトは Scene クラスに格納されます。そのために、すべてのタイプのライトへの参照を格納する という名前の新しいクラスを作成しSceneLightsます (1 つのアンビエント ライト インスタンスと 1 つのディレクショナル ライトのみが必要であることに注意してください)。
package org.lwjglb.engine.scene.lights;

import org.joml.Vector3f;

import java.util.*;

public class SceneLights {

    private AmbientLight ambientLight;
    private DirLight dirLight;
    private List<PointLight> pointLights;
    private List<SpotLight> spotLights;

    public SceneLights() {
        ambientLight = new AmbientLight();
        pointLights = new ArrayList<>();
        spotLights = new ArrayList<>();
        dirLight = new DirLight(new Vector3f(1, 1, 1), new Vector3f(0, 1, 0), 1.0f);
    }

    public AmbientLight getAmbientLight() {
        return ambientLight;
    }

    public DirLight getDirLight() {
        return dirLight;
    }

    public List<PointLight> getPointLights() {
        return pointLights;
    }

    public List<SpotLight> getSpotLights() {
        return spotLights;
    }

    public void setSpotLights(List<SpotLight> spotLights) {
        this.spotLights = spotLights;
    }
}
Sceneクラス
クラスSceneLightsには次の参照があります。Scene
public class Scene {
    ...
    private SceneLights sceneLights;
    ...
    public SceneLights getSceneLights() {
        return sceneLights;
    }
    ...
    public void setSceneLights(SceneLights sceneLights) {
        this.sceneLights = sceneLights;
    }
}
モデル読み込みの変更
ModelLoaderクラスを次のように変更する必要があります。
・マテリアルのより多くのプロパティ、特にアンビエント カラー、スペキュラ カラー、光沢係数を取得します。
ModelLoaderクラス
public class ModelLoader {
    ...
    private static Material processMaterial(AIMaterial aiMaterial, String modelDir, TextureCache textureCache) {
        Material material = new Material();
        try (MemoryStack stack = MemoryStack.stackPush()) {
            AIColor4D color = AIColor4D.create();

            int result = aiGetMaterialColor(aiMaterial, AI_MATKEY_COLOR_AMBIENT, aiTextureType_NONE, 0,
                    color);
            if (result == aiReturn_SUCCESS) {
                material.setAmbientColor(new Vector4f(color.r(), color.g(), color.b(), color.a()));
            }

            result = aiGetMaterialColor(aiMaterial, AI_MATKEY_COLOR_DIFFUSE, aiTextureType_NONE, 0,
                    color);
            if (result == aiReturn_SUCCESS) {
                material.setDiffuseColor(new Vector4f(color.r(), color.g(), color.b(), color.a()));
            }

            result = aiGetMaterialColor(aiMaterial, AI_MATKEY_COLOR_SPECULAR, aiTextureType_NONE, 0,
                    color);
            if (result == aiReturn_SUCCESS) {
                material.setSpecularColor(new Vector4f(color.r(), color.g(), color.b(), color.a()));
            }
            float reflectance = 0.0f;
            float[] shininessFactor = new float[]{0.0f};
            int[] pMax = new int[]{1};
            result = aiGetMaterialFloatArray(aiMaterial, AI_MATKEY_SHININESS_STRENGTH, aiTextureType_NONE, 0, shininessFactor, pMax);
            if (result != aiReturn_SUCCESS) {
                reflectance = shininessFactor[0];
            }
            material.setReflectance(reflectance);

            AIString aiTexturePath = AIString.calloc(stack);
            aiGetMaterialTexture(aiMaterial, aiTextureType_DIFFUSE, 0, aiTexturePath, (IntBuffer) null,
                    null, null, null, null, null);
            String texturePath = aiTexturePath.dataString();
            if (texturePath != null && texturePath.length() > 0) {
                material.setTexturePath(modelDir + File.separator + new File(texturePath).getName());
                textureCache.createTexture(material.getTexturePath());
                material.setDiffuseColor(Material.DEFAULT_COLOR);
            }

            return material;
        }
    }
    ...
ご覧のとおり、プロパティを取得することでマテリアルのアンビエント カラーを取得しAI_MATKEY_COLOR_AMBIENTます。プロパティを使用してスペキュラー カラーを取得しAI_MATKEY_COLOR_SPECULARます。光沢はAI_MATKEY_SHININESS_STRENGTHフラグを使用して照会されます。
法線をロードするには、という名前の新しいメソッドを作成し、メソッドprocessNormalsで呼び出す必要がありますprocessMesh。
public class ModelLoader {
    ...
    private static Mesh processMesh(AIMesh aiMesh) {
        float[] vertices = processVertices(aiMesh);
        float[] normals = processNormals(aiMesh);
        float[] textCoords = processTextCoords(aiMesh);
        int[] indices = processIndices(aiMesh);

        // Texture coordinates may not have been populated. We need at least the empty slots
        if (textCoords.length == 0) {
            int numElements = (vertices.length / 3) * 2;
            textCoords = new float[numElements];
        }

        return new Mesh(vertices, normals, textCoords, indices);
    }

    private static float[] processNormals(AIMesh aiMesh) {
        AIVector3D.Buffer buffer = aiMesh.mNormals();
        float[] data = new float[buffer.remaining() * 3];
        int pos = 0;
        while (buffer.remaining() > 0) {
            AIVector3D normal = buffer.get();
            data[pos++] = normal.x();
            data[pos++] = normal.y();
            data[pos++] = normal.z();
        }
        return data;
    }
    ...
}
Materialクラス
ご覧のとおり、新しい情報を格納するためにMaterialおよびMeshクラスも変更する必要があります。クラスの変更点は次のMaterialとおりです。
public class Material {
    ...
    private Vector4f ambientColor;
    ...
    private float reflectance;
    private Vector4f specularColor;
    ...
    public Material() {
        ...
        ambientColor = DEFAULT_COLOR;
        ...
    }
    ...
    public Vector4f getAmbientColor() {
        return ambientColor;
    }
    ...
    public float getReflectance() {
        return reflectance;
    }

    public Vector4f getSpecularColor() {
        return specularColor;
    }
    ...
    public void setAmbientColor(Vector4f ambientColor) {
        this.ambientColor = ambientColor;
    }
    ...
    public void setReflectance(float reflectance) {
        this.reflectance = reflectance;
    }

    public void setSpecularColor(Vector4f specularColor) {
        this.specularColor = specularColor;
    }
    ...
}
Meshクラス
Meshクラスは法線データの新しい float 配列を受け入れるようになり、そのために新しい VBO を作成します。
public class Mesh {
    ...
    public Mesh(float[] positions, float[] normals, float[] textCoords, int[] indices) {
        ...
            // Normals VBO
            vboId = glGenBuffers();
            vboIdList.add(vboId);
            FloatBuffer normalsBuffer = stack.callocFloat(normals.length);
            normalsBuffer.put(0, normals);
            glBindBuffer(GL_ARRAY_BUFFER, vboId);
            glBufferData(GL_ARRAY_BUFFER, normalsBuffer, GL_STATIC_DRAW);
            glEnableVertexAttribArray(1);
            glVertexAttribPointer(1, 3, GL_FLOAT, false, 0, 0);

            // Texture coordinates VBO
            ...
            glEnableVertexAttribArray(2);
            glVertexAttribPointer(2, 2, GL_FLOAT, false, 0, 0);

            // Index VBO
            ...
        ...
    }
    ...
}
ライトでレンダリングする
レンダリング中にライトを使用する時が来ました。シェーダー、特に頂点シェーダー ( scene.vert)から始めましょう。
#version 330

layout (location=0) in vec3 position;
layout (location=1) in vec3 normal;
layout (location=2) in vec2 texCoord;

out vec3 outPosition;
out vec3 outNormal;
out vec2 outTextCoord;

uniform mat4 projectionMatrix;
uniform mat4 viewMatrix;
uniform mat4 modelMatrix;

void main()
{
    mat4 modelViewMatrix = viewMatrix * modelMatrix;
    vec4 mvPosition =  modelViewMatrix * vec4(position, 1.0);
    gl_Position = projectionMatrix * mvPosition;
    outPosition = mvPosition.xyz;
    outNormal = normalize(modelViewMatrix * vec4(normal, 0.0)).xyz;
    outTextCoord = texCoord;
}
ご覧のとおり、別の入力属性として通常のデータがあり、そのデータをフラグメント シェーダーに渡すだけです。フラグメント シェーダーの説明を続ける前に、強調しなければならない非常に重要な概念があります。mvVertexNormal上記のコードから、変数には頂点法線が含まれ、モデル ビュー空間座標に変換されることがわかります。これは、 に頂点位置を掛けることnormalによって行われます。modelViewMatrixただし、微妙な違いがあります。その頂点法線の w コンポーネントは、行列を乗算する前に 0 に設定されます。vec4(vertexNormal, 0.0). なぜこれを行うのですか?法線を回転およびスケーリングしたいが、平行移動したくないため、関心があるのはその方向だけであり、その位置には関心がありません。これは w コンポーネントを 0 に設定することで実現され、同次座標を使用する利点の 1 つです。w コンポーネントを設定することで、適用される変換を制御できます。行列の乗算を手動で行うことができ、これが発生する理由を確認できます。
フラグメント シェーダーの変更scene.fragは非常に複雑です。1 つずつステップを進めていきましょう。
<scene.frag>
#version 330

const int MAX_POINT_LIGHTS = 5;
const int MAX_SPOT_LIGHTS = 5;
const float SPECULAR_POWER = 10;

in vec3 outPosition;
in vec3 outNormal;
in vec2 outTextCoord;

out vec4 fragColor;
...
最初に、サポートするポント ライトとスポット ライトの最大数に対する定数の最大値を定義します。これらのライトのデータは、コンパイル時に適切に定義されたサイズを持つ必要があるユニフォームの配列として渡されるため、これが必要です。また、頂点シェーダーから通常のデータを受け取っていることもわかります。その後、ライト データをモデル化する構造体を定義します。
...
struct Attenuation
{
    float constant;
    float linear;
    float exponent;
};
struct Material
{
    vec4 ambient;
    vec4 diffuse;
    vec4 specular;
    float reflectance;
};
struct AmbientLight
{
    float factor;
    vec3 color;
};
struct PointLight {
    vec3 position;
    vec3 color;
    float intensity;
    Attenuation att;
};
struct SpotLight
{
    PointLight pl;
    vec3 conedir;
    float cutoff;
};
struct DirLight
{
    vec3 color;
    vec3 direction;
    float intensity;
};
...
その後、ライト データの新しいユニフォームを定義します。
...
uniform sampler2D txtSampler;
uniform Material material;
uniform AmbientLight ambientLight;
uniform PointLight pointLights[MAX_POINT_LIGHTS];
uniform SpotLight spotLights[MAX_SPOT_LIGHTS];
uniform DirLight dirLight
...
次に、周囲光から始めて、各ライト タイプの効果を計算する関数をいくつか定義します。
...
vec4 calcAmbient(AmbientLight ambientLight, vec4 ambient) {
    return vec4(ambientLight.factor * ambientLight.color, 1) * ambient;
}
...
ご覧のとおり、マテリアルのアンビエント カラーに適用される係数によってアンビエント ライトの色を変調するだけです。ここで、さまざまな種類のライトに対してカラー ライトを計算する方法を定義する関数を定義します。
...
vec4 calcLightColor(vec4 diffuse, vec4 specular, vec3 lightColor, float light_intensity, vec3 position, vec3 to_light_dir, vec3 normal) {
    vec4 diffuseColor = vec4(0, 0, 0, 1);
    vec4 specColor = vec4(0, 0, 0, 1);

    // Diffuse Light
    float diffuseFactor = max(dot(normal, to_light_dir), 0.0);
    diffuseColor = diffuse * vec4(lightColor, 1.0) * light_intensity * diffuseFactor;

    // Specular Light
    vec3 camera_direction = normalize(-position);
    vec3 from_light_dir = -to_light_dir;
    vec3 reflected_light = normalize(reflect(from_light_dir, normal));
    float specularFactor = max(dot(camera_direction, reflected_light), 0.0);
    specularFactor = pow(specularFactor, SPECULAR_POWER);
    specColor = specular * light_intensity  * specularFactor * material.reflectance * vec4(lightColor, 1.0);

    return (diffuseColor + specColor);
}
...
前のコードは比較的単純で、拡散コンポーネントの色を計算し、鏡面コンポーネントの別の色を計算し、処理中の頂点への移動中に光が受ける減衰によって変調します。これで、各タイプのライトに対して呼び出される関数を定義できます。ポイント ライトから始めます。
...
vec4 calcPointLight(vec4 diffuse, vec4 specular, PointLight light, vec3 position, vec3 normal) {
    vec3 light_direction = light.position - position;
    vec3 to_light_dir  = normalize(light_direction);
    vec4 light_color = calcLightColor(diffuse, specular, light.color, light.intensity, position, to_light_dir, normal);

    // Apply Attenuation
    float distance = length(light_direction);
    float attenuationInv = light.att.constant + light.att.linear * distance +
    light.att.exponent * distance * distance;
    return light_color / attenuationInv;
}
...
ご覧のとおり、光の方向を (法線として) 計算し、その情報を使用して、マテリアルの拡散色と反射色、光の色、強度、位置、方向、および法線方向を使用して、光の色を計算します。 . その後、減衰を適用します。スポット ライトの機能は次のとおりです。
...
vec4 calcSpotLight(vec4 diffuse, vec4 specular, SpotLight light, vec3 position, vec3 normal) {
    vec3 light_direction = light.pl.position - position;
    vec3 to_light_dir  = normalize(light_direction);
    vec3 from_light_dir  = -to_light_dir;
    float spot_alfa = dot(from_light_dir, normalize(light.conedir));

    vec4 color = vec4(0, 0, 0, 0);

    if (spot_alfa > light.cutoff)
    {
        color = calcPointLight(diffuse, specular, light.pl, position, normal);
        color *= (1.0 - (1.0 - spot_alfa)/(1.0 - light.cutoff));
    }
    return color;
}
...
手順は、光の円錐の内側にいるかどうかを制御する必要があることを除いて、ポイント ライトに似ています。先に説明したように、円錐状の光の内側にも減衰を適用する必要があります。最後に、ディレクショナル ライトの関数を以下に定義します。
...
vec4 calcDirLight(vec4 diffuse, vec4 specular, DirLight light, vec3 position, vec3 normal) {
    return calcLightColor(diffuse, specular, light.color, light.intensity, position, normalize(light.direction), normal);
}
...
SceneRenderクラス
この場合、光の方向はすでにわかっており、減衰がないため、光の位置を考慮する必要はありません。最後に、mainメソッドでは、最終的なフラグメント カラーの拡散鏡面コンポーネントに寄与するさまざまなライト タイプを反復処理します。
public class SceneRender {

    private static final int MAX_POINT_LIGHTS = 5;
    private static final int MAX_SPOT_LIGHTS = 5;
    ...
    private void createUniforms() {
        ...
        uniformsMap.createUniform("material.ambient");
        uniformsMap.createUniform("material.diffuse");
        uniformsMap.createUniform("material.specular");
        uniformsMap.createUniform("material.reflectance");
        uniformsMap.createUniform("ambientLight.factor");
        uniformsMap.createUniform("ambientLight.color");

        for (int i = 0; i < MAX_POINT_LIGHTS; i++) {
            String name = "pointLights[" + i + "]";
            uniformsMap.createUniform(name + ".position");
            uniformsMap.createUniform(name + ".color");
            uniformsMap.createUniform(name + ".intensity");
            uniformsMap.createUniform(name + ".att.constant");
            uniformsMap.createUniform(name + ".att.linear");
            uniformsMap.createUniform(name + ".att.exponent");
        }
        for (int i = 0; i < MAX_SPOT_LIGHTS; i++) {
            String name = "spotLights[" + i + "]";
            uniformsMap.createUniform(name + ".pl.position");
            uniformsMap.createUniform(name + ".pl.color");
            uniformsMap.createUniform(name + ".pl.intensity");
            uniformsMap.createUniform(name + ".pl.att.constant");
            uniformsMap.createUniform(name + ".pl.att.linear");
            uniformsMap.createUniform(name + ".pl.att.exponent");
            uniformsMap.createUniform(name + ".conedir");
            uniformsMap.createUniform(name + ".cutoff");
        }

        uniformsMap.createUniform("dirLight.color");
        uniformsMap.createUniform("dirLight.direction");
        uniformsMap.createUniform("dirLight.intensity");
    }
    ...
}
配列を使用している場合、リストの各要素に対してユニフォームを作成する必要があります。たとえば、pointLights
ダー呼び出しごとにライトのユニフォームを更新する新しいメソッドを作成します。このメソッドにupdateLightsは次のように名前が付けられ、定義されます。
public class SceneRender {
    ...
    private void updateLights(Scene scene) {
        Matrix4f viewMatrix = scene.getCamera().getViewMatrix();

        SceneLights sceneLights = scene.getSceneLights();
        AmbientLight ambientLight = sceneLights.getAmbientLight();
        uniformsMap.setUniform("ambientLight.factor", ambientLight.getIntensity());
        uniformsMap.setUniform("ambientLight.color", ambientLight.getColor());

        DirLight dirLight = sceneLights.getDirLight();
        Vector4f auxDir = new Vector4f(dirLight.getDirection(), 0);
        auxDir.mul(viewMatrix);
        Vector3f dir = new Vector3f(auxDir.x, auxDir.y, auxDir.z);
        uniformsMap.setUniform("dirLight.color", dirLight.getColor());
        uniformsMap.setUniform("dirLight.direction", dir);
        uniformsMap.setUniform("dirLight.intensity", dirLight.getIntensity());

        List<PointLight> pointLights = sceneLights.getPointLights();
        int numPointLights = pointLights.size();
        PointLight pointLight;
        for (int i = 0; i < MAX_POINT_LIGHTS; i++) {
            if (i < numPointLights) {
                pointLight = pointLights.get(i);
            } else {
                pointLight = null;
            }
            String name = "pointLights[" + i + "]";
            updatePointLight(pointLight, name, viewMatrix);
        }

        List<SpotLight> spotLights = sceneLights.getSpotLights();
        int numSpotLights = spotLights.size();
        SpotLight spotLight;
        for (int i = 0; i < MAX_SPOT_LIGHTS; i++) {
            if (i < numSpotLights) {
                spotLight = spotLights.get(i);
            } else {
                spotLight = null;
            }
            String name = "spotLights[" + i + "]";
            updateSpotLight(spotLight, name, viewMatrix);
        }
    }
    ...
}
コードは非常に単純です。環境光をディレクショナル ライト ユニフォームに設定することから始め、その後、配列の各要素のユニフォームを設定する専用のメソッドを持つポイント ライトとスポット ライトを反復処理します。
public class SceneRender {
    ...
    private void updatePointLight(PointLight pointLight, String prefix, Matrix4f viewMatrix) {
        Vector4f aux = new Vector4f();
        Vector3f lightPosition = new Vector3f();
        Vector3f color = new Vector3f();
        float intensity = 0.0f;
        float constant = 0.0f;
        float linear = 0.0f;
        float exponent = 0.0f;
        if (pointLight != null) {
            aux.set(pointLight.getPosition(), 1);
            aux.mul(viewMatrix);
            lightPosition.set(aux.x, aux.y, aux.z);
            color.set(pointLight.getColor());
            intensity = pointLight.getIntensity();
            PointLight.Attenuation attenuation = pointLight.getAttenuation();
            constant = attenuation.getConstant();
            linear = attenuation.getLinear();
            exponent = attenuation.getExponent();
        }
        uniformsMap.setUniform(prefix + ".position", lightPosition);
        uniformsMap.setUniform(prefix + ".color", color);
        uniformsMap.setUniform(prefix + ".intensity", intensity);
        uniformsMap.setUniform(prefix + ".att.constant", constant);
        uniformsMap.setUniform(prefix + ".att.linear", linear);
        uniformsMap.setUniform(prefix + ".att.exponent", exponent);
    }

    private void updateSpotLight(SpotLight spotLight, String prefix, Matrix4f viewMatrix) {
        PointLight pointLight = null;
        Vector3f coneDirection = new Vector3f();
        float cutoff = 0.0f;
        if (spotLight != null) {
            coneDirection = spotLight.getConeDirection();
            cutoff = spotLight.getCutOff();
            pointLight = spotLight.getPointLight();
        }

        uniformsMap.setUniform(prefix + ".conedir", coneDirection);
        uniformsMap.setUniform(prefix + ".conedir", cutoff);
        updatePointLight(pointLight, prefix + ".pl", viewMatrix);
    }
    ...
}
すでに述べたように、これらのライトの座標はビュー スペース内にある必要があります。通常、ワールド空間座標でライト座標を設定するため、シェーダーで使用できるようにするには、それらをビュー マトリックスで乗算する必要があります。最後に、メソッドを更新してrenderメソッドを呼び出しupdateLights、モデル マテリアルの新しい要素を適切に設定する必要があります。
public class SceneRender {
    ...
    public void render(Scene scene) {
        ...
        updateLights(scene);
        ...
        for (Model model : models) {
            List<Entity> entities = model.getEntitiesList();

            for (Material material : model.getMaterialList()) {
                uniformsMap.setUniform("material.ambient", material.getAmbientColor());
                uniformsMap.setUniform("material.diffuse", material.getDiffuseColor());
                uniformsMap.setUniform("material.specular", material.getSpecularColor());
                uniformsMap.setUniform("material.reflectance", material.getReflectance());
                ...
            }
        }
        ...
    }
    ...
}
UniformsMapクラス
UniformsMapまた、float と 3D ベクトルの値を設定するためのユニフォームを作成するためのメソッドのペアをクラスに追加する必要があります。
public class UniformsMap {
    ...
    public void setUniform(String uniformName, float value) {
        glUniform1f(getUniformLocation(uniformName), value);
    }

    public void setUniform(String uniformName, Vector3f value) {
        glUniform3f(getUniformLocation(uniformName), value.x, value.y, value.z);
    }
    ...
}
ライトコントロール
最後のステップは、Mainクラスでライトを使用することです。ただし、その前に、Imgui を使用して GUI を作成し、ライト パラメータを制御する要素をいくつか提供します。という名前の新しいクラスでこれを行いますLightControls。コードは長すぎますが、理解するのは非常に簡単です。GUI コントロールから値を取得するための一連の属性と、必要なパネルとウィジェットを描画するためのメソッドを設定するだけで済みます。
package org.lwjglb.game;

import imgui.*;
import imgui.flag.ImGuiCond;
import org.joml.*;
import org.lwjglb.engine.*;
import org.lwjglb.engine.scene.Scene;
import org.lwjglb.engine.scene.lights.*;

public class LightControls implements IGuiInstance {

    private float[] ambientColor;
    private float[] ambientFactor;
    private float[] dirConeX;
    private float[] dirConeY;
    private float[] dirConeZ;
    private float[] dirLightColor;
    private float[] dirLightIntensity;
    private float[] dirLightX;
    private float[] dirLightY;
    private float[] dirLightZ;
    private float[] pointLightColor;
    private float[] pointLightIntensity;
    private float[] pointLightX;
    private float[] pointLightY;
    private float[] pointLightZ;
    private float[] spotLightColor;
    private float[] spotLightCuttoff;
    private float[] spotLightIntensity;
    private float[] spotLightX;
    private float[] spotLightY;
    private float[] spotLightZ;

    public LightControls(Scene scene) {
        SceneLights sceneLights = scene.getSceneLights();
        AmbientLight ambientLight = sceneLights.getAmbientLight();
        Vector3f color = ambientLight.getColor();

        ambientFactor = new float[]{ambientLight.getIntensity()};
        ambientColor = new float[]{color.x, color.y, color.z};

        PointLight pointLight = sceneLights.getPointLights().get(0);
        color = pointLight.getColor();
        Vector3f pos = pointLight.getPosition();
        pointLightColor = new float[]{color.x, color.y, color.z};
        pointLightX = new float[]{pos.x};
        pointLightY = new float[]{pos.y};
        pointLightZ = new float[]{pos.z};
        pointLightIntensity = new float[]{pointLight.getIntensity()};

        SpotLight spotLight = sceneLights.getSpotLights().get(0);
        pointLight = spotLight.getPointLight();
        color = pointLight.getColor();
        pos = pointLight.getPosition();
        spotLightColor = new float[]{color.x, color.y, color.z};
        spotLightX = new float[]{pos.x};
        spotLightY = new float[]{pos.y};
        spotLightZ = new float[]{pos.z};
        spotLightIntensity = new float[]{pointLight.getIntensity()};
        spotLightCuttoff = new float[]{spotLight.getCutOffAngle()};
        Vector3f coneDir = spotLight.getConeDirection();
        dirConeX = new float[]{coneDir.x};
        dirConeY = new float[]{coneDir.y};
        dirConeZ = new float[]{coneDir.z};

        DirLight dirLight = sceneLights.getDirLight();
        color = dirLight.getColor();
        pos = dirLight.getDirection();
        dirLightColor = new float[]{color.x, color.y, color.z};
        dirLightX = new float[]{pos.x};
        dirLightY = new float[]{pos.y};
        dirLightZ = new float[]{pos.z};
        dirLightIntensity = new float[]{dirLight.getIntensity()};
    }

    @Override
    public void drawGui() {
        ImGui.newFrame();
        ImGui.setNextWindowPos(0, 0, ImGuiCond.Always);
        ImGui.setNextWindowSize(450, 400);

        ImGui.begin("Lights controls");
        if (ImGui.collapsingHeader("Ambient Light")) {
            ImGui.sliderFloat("Ambient factor", ambientFactor, 0.0f, 1.0f, "%.2f");
            ImGui.colorEdit3("Ambient color", ambientColor);
        }

        if (ImGui.collapsingHeader("Point Light")) {
            ImGui.sliderFloat("Point Light - x", pointLightX, -10.0f, 10.0f, "%.2f");
            ImGui.sliderFloat("Point Light - y", pointLightY, -10.0f, 10.0f, "%.2f");
            ImGui.sliderFloat("Point Light - z", pointLightZ, -10.0f, 10.0f, "%.2f");
            ImGui.colorEdit3("Point Light color", pointLightColor);
            ImGui.sliderFloat("Point Light Intensity", pointLightIntensity, 0.0f, 1.0f, "%.2f");
        }

        if (ImGui.collapsingHeader("Spot Light")) {
            ImGui.sliderFloat("Spot Light - x", spotLightX, -10.0f, 10.0f, "%.2f");
            ImGui.sliderFloat("Spot Light - y", spotLightY, -10.0f, 10.0f, "%.2f");
            ImGui.sliderFloat("Spot Light - z", spotLightZ, -10.0f, 10.0f, "%.2f");
            ImGui.colorEdit3("Spot Light color", spotLightColor);
            ImGui.sliderFloat("Spot Light Intensity", spotLightIntensity, 0.0f, 1.0f, "%.2f");
            ImGui.separator();
            ImGui.sliderFloat("Spot Light cutoff", spotLightCuttoff, 0.0f, 360.0f, "%2.f");
            ImGui.sliderFloat("Dir cone - x", dirConeX, -1.0f, 1.0f, "%.2f");
            ImGui.sliderFloat("Dir cone - y", dirConeY, -1.0f, 1.0f, "%.2f");
            ImGui.sliderFloat("Dir cone - z", dirConeZ, -1.0f, 1.0f, "%.2f");
        }

        if (ImGui.collapsingHeader("Dir Light")) {
            ImGui.sliderFloat("Dir Light - x", dirLightX, -1.0f, 1.0f, "%.2f");
            ImGui.sliderFloat("Dir Light - y", dirLightY, -1.0f, 1.0f, "%.2f");
            ImGui.sliderFloat("Dir Light - z", dirLightZ, -1.0f, 1.0f, "%.2f");
            ImGui.colorEdit3("Dir Light color", dirLightColor);
            ImGui.sliderFloat("Dir Light Intensity", dirLightIntensity, 0.0f, 1.0f, "%.2f");
        }

        ImGui.end();
        ImGui.endFrame();
        ImGui.render();
    }
    ...
}
最後に、GUI 入力を処理するメソッドが必要です。ここでは、マウスの状態に基づいて Imgui を更新し、入力が GUI コントロールによって消費されたかどうかを確認します。その場合、ユーザー入力に従ってクラスの属性を入力するだけです。
public class LightControls implements IGuiInstance {
    ...
    @Override
    public boolean handleGuiInput(Scene scene, Window window) {
        ImGuiIO imGuiIO = ImGui.getIO();
        MouseInput mouseInput = window.getMouseInput();
        Vector2f mousePos = mouseInput.getCurrentPos();
        imGuiIO.setMousePos(mousePos.x, mousePos.y);
        imGuiIO.setMouseDown(0, mouseInput.isLeftButtonPressed());
        imGuiIO.setMouseDown(1, mouseInput.isRightButtonPressed());

        boolean consumed = imGuiIO.getWantCaptureMouse() || imGuiIO.getWantCaptureKeyboard();
        if (consumed) {
            SceneLights sceneLights = scene.getSceneLights();
            AmbientLight ambientLight = sceneLights.getAmbientLight();
            ambientLight.setIntensity(ambientFactor[0]);
            ambientLight.setColor(ambientColor[0], ambientColor[1], ambientColor[2]);

            PointLight pointLight = sceneLights.getPointLights().get(0);
            pointLight.setPosition(pointLightX[0], pointLightY[0], pointLightZ[0]);
            pointLight.setColor(pointLightColor[0], pointLightColor[1], pointLightColor[2]);
            pointLight.setIntensity(pointLightIntensity[0]);

            SpotLight spotLight = sceneLights.getSpotLights().get(0);
            pointLight = spotLight.getPointLight();
            pointLight.setPosition(spotLightX[0], spotLightY[0], spotLightZ[0]);
            pointLight.setColor(spotLightColor[0], spotLightColor[1], spotLightColor[2]);
            pointLight.setIntensity(spotLightIntensity[0]);
            spotLight.setCutOffAngle(spotLightColor[0]);
            spotLight.setConeDirection(dirConeX[0], dirConeY[0], dirConeZ[0]);

            DirLight dirLight = sceneLights.getDirLight();
            dirLight.setPosition(dirLightX[0], dirLightY[0], dirLightZ[0]);
            dirLight.setColor(dirLightColor[0], dirLightColor[1], dirLightColor[2]);
            dirLight.setIntensity(dirLightIntensity[0]);
        }
        return consumed;
    }
}
Mainクラス
最後のステップは、Mainクラスを更新してライトを作成し、以前のメソッドdrawGuiとhandleGuiInputメソッドを削除することです (LightControlsクラスでの処理は省略します)。
public class Main implements IAppLogic {
    ...
    private LightControls lightControls;

    public static void main(String[] args) {
        ...
        Engine gameEng = new Engine("chapter-11", new Window.WindowOptions(), main);
        ...
    }
    ...
    public void init(Window window, Scene scene, Render render) {
        Model cubeModel = ModelLoader.loadModel("cube-model", "resources/models/cube/cube.obj",
                scene.getTextureCache());
        scene.addModel(cubeModel);

        cubeEntity = new Entity("cube-entity", cubeModel.getId());
        cubeEntity.setPosition(0, 0f, -2);
        cubeEntity.updateModelMatrix();
        scene.addEntity(cubeEntity);

        SceneLights sceneLights = new SceneLights();
        sceneLights.getAmbientLight().setIntensity(0.3f);
        scene.setSceneLights(sceneLights);
        sceneLights.getPointLights().add(new PointLight(new Vector3f(1, 1, 1),
                new Vector3f(0, 0, -1.4f), 1.0f));

        Vector3f coneDir = new Vector3f(0, 0, -1);
        sceneLights.getSpotLights().add(new SpotLight(new PointLight(new Vector3f(1, 1, 1),
                new Vector3f(0, 0, -1.4f), 0.0f), coneDir, 140.0f));

        lightControls = new LightControls(scene);
        scene.setGuiInstance(lightControls);
    }
    ...
    @Override
    public void update(Window window, Scene scene, long diffTimeMillis) {
        // Nothing to be done here
    }
}
最後に、これに似たものを見ることができます。