Arduino IoT ~Arduino IDEの使い方~

イントロダクション

昨今、IOTという言葉が使われるようになって久しいですが、「IOTとはなんぞや?」という疑問がぬぐえないのも一つの現実ではないでしょうか?

抽象的なんですね。「インターネットに接続できる小物関連なら何でもいいんじゃね?」と思って間違いないのでは?
こちらのページを見てみると、次のように書いています。

IoT:Internet of Thingsにより、インターネット経由でセンサーと通信機能を持ったモノ達、例えば、ドアが「今、開いているよ。」、工場内の機械が「調子が悪いよ。故障しそうだよ。」、植物が「水が欲しいよ。」、猫の首輪が「今トイレにいるよ。」等とつぶやき始めるのです。これらの情報をインターネットを介し様々な場所で活用することができます。

早い話が、「詳細な定義はない」という認識です。「ネットにつながる何か?」がIOTということになります。

Arduino + Java(できない)

自分はJava言語を主に学習しているので、Java言語でいろいろとやりたいと思っているのですが、Java + 電子工作というのがなかなかできませんでした。

しかし、最近は、いろいろとツールがあるようで。。。早速実践したいと思います。

Arduino クラウド

最近の流行なのか「クラウド」というものがよく使われるようです。確かに、使用するPC毎に開発環境を作るのも大変です。
ならば、ブラウザで開発できれば早いですよね。
ということだと思います。ここからアクセスできるので、いろいろと調べていきます。

Firmataについて

Firmataというプロトコル(通信するときに使用するもの(http,ftpなど))の一つでArduinoと通信する。
主に以下の二つの機能があるようです。

  • Arduino デバイスとホスト コンピューターで実行されているソフトウェアとの間でデータを選択的に送受信します。
  • StandardFirmata と呼ばれる汎用スケッチ (または必要に応じて StandardFirmataPlus や StandardFirmataEthernet などのバリアントの 1 つ) を Arduino ボードにロードし、ホスト コンピューターを排他的に使用して Arduino ボードと対話する

Firmata4jを使う

よくよく調べてみるとFirmataは、PCなどからArduinoにメッセージを送って操作する、リモコンのような機能の実装に使用するプロトコルらしいのと、動かせなかったのを踏まえて、Arduino言語での実装を行うことにしました。
Firmataというプロトコルがあるようなので、これを使用してLチカをしたいと思います。
上記のリンク先には、下のような手順が示されているので、それに従います。

ArduinoでFirmataプロトコルを使用してホストコンピュータとやり取りする場合は、ArduinoIDEを立ち上げて、ファイル -> スケッチの例 -> Firmata -> Standard Firmata を選択、開きそのままArduinoに書き込めば良いです。

まずは、Arduino IDEが必要なので、これをインストールします。しかし、ブラウザでIDEが使えるようなのでウェブエディタのほうを使用することに会います。

次は、Javaプログラムを実行するのですが、バージョンが2.3.1以上である必要があるらしく、まぁ動かなかったので。。。

Arduinoの実装

Javaを使いたいという思いをあきらめて、そのままC言語のような
C言語のようなコードで実装することにします。Arduino言語というようです。
ちなみに、Lチカをやってみました。
コードとしては、下のようなものです。

#define LED_PIN 13
#define WAIT_TIME 1000

void setup() {
  pinMode(LED_PIN,OUTPUT);
}

void loop() {
  digitalWrite(LED_PIN,HIGH);
  delay(WAIT_TIME);
  digitalWrite(LED_PIN,LOW);
  delay(WAIT_TIME);
}

プログラムの内容としては、リファレンスにありますが、大まかに自分の理解している部分を解説すると以下のようになります。

Arduinoプログラム

まずは、「setup()」が動いて「loop()」がループして待機処理をするような感じです。
そして、定数としてはつぎのように解説がありました。
#define

#defineで定義された定数は、コンパイル時に値へと置き換えられ、チップ上のメモリ(RAM)を消費しません。

#include

#includeは外部のライブラリ(あらかじめ用意された機能群)をあなたのスケッチに取り入れたいときに使います。

制御文

Javaプログラムをやっているひとであれば、なじみのある構文になっています。C言語とほぼ同じです。

if (someVariable > 50) {
  // 条件を満たしたとき実行される文
}

// if-else
if (pinFiveInput < 500) {
  // 動作A
} else {
  // 動作B
}

For文

int PWMpin = 13;
for (int i=0; i <= 255; i++){
    analogWrite(PWMpin, i);
    delay(10);
}

関数の定義もC言語と同じようです。

返却値 関数名(引数)

// 足し算する関数
int tashizan(int left, int right) {
   return left + right;
}

ここまで、C言語とそっくりなのであれば、Java言語に慣れ親しんでいる人であれば、すぐに使えると思います。
注意点としては、Arduino言語には、すでに実装されている関数が多数あるので、それをうまく使うようにする、というところです。

Arduino IDE

デスクトップ版と、クラウド版があるようです。昔は、寄付とか要求されずにデスクトップ版がダウンロードできたのですが、
今はクラウド版でやるのがよろしいようで。。。

Arduinoの公式サイトにアクセスして、クラウドの利用をするためのサインアップを行い、クライアントアプリをインストールすれば使用できるようです。
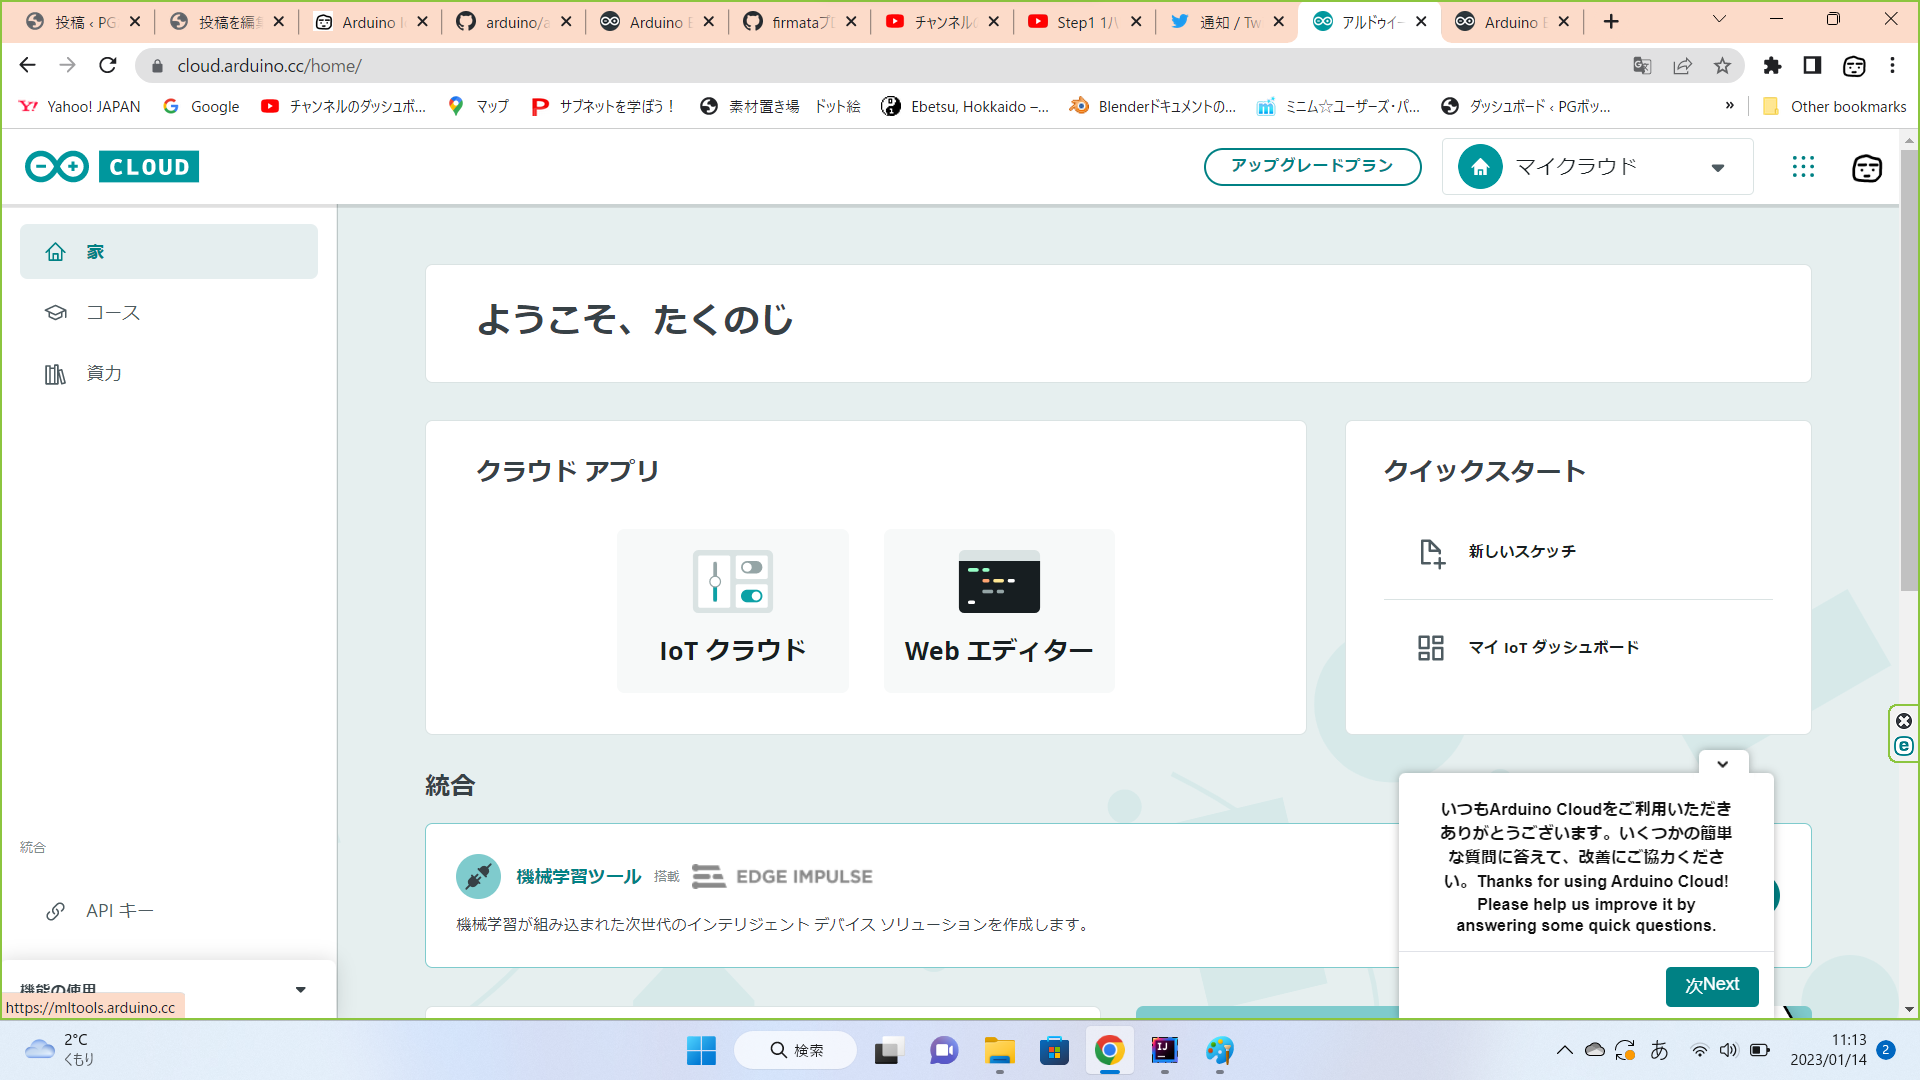
ウェブエディターを使う

最近では、フツーになったのでしょうか?ウェブでコーディングできるのでPCはなんでもよさそうです。
余談ですが、自分のPCにArduinoを接続したらこんな感じでした。

## Javaコードを作成する
IntelliJ IDEAを使用しているので、次のような形でJavaプロジェクト作成しました。
![](http://zenryokuservice.com/wp/wp-content/uploads/2021/08/arduino2.png)
POMファイルは、下のように追加修正しました。
```
<?xml version="1.0" encoding="UTF-8"?>
<project xmlns="http://maven.apache.org/POM/4.0.0"
xmlns:xsi="http://www.w3.org/2001/XMLSchema-instance"
xsi:schemaLocation="http://maven.apache.org/POM/4.0.0 http://maven.apache.org/xsd/maven-4.0.0.xsd">
<modelVersion>4.0.0</modelVersion>

<groupId>org.example</groupId>
<artifactId>ArduinoPractice</artifactId>
<version>1.0-SNAPSHOT</version>

<properties>
<maven.compiler.source>8</maven.compiler.source>
<maven.compiler.target>8</maven.compiler.target>
<project.build.sourceEncoding>UTF-8</project.build.sourceEncoding>
</properties>

<dependencies>
<dependency>
<groupId>com.github.kurbatov</groupId>
<artifactId>firmata4j</artifactId>
<version>2.3.8</version>
</dependency>
</dependencies>
</project>
```
これでプロジェクトをリロード(Mavenリロード)すれば、必要なライブラリはOKです。

## インストール(デスクトップ)
[こちらのリンクから](https://www.arduino.cc/en/software/)ダウンロードできます。
そして、インストールが終わったら、使い方を学びます。

[参考サイトはこちら](https://www.indoorcorgielec.com/resources/arduinoide%E8%A8%AD%E5%AE%9A/arduino-ide%E3%83%97%E3%83%AD%E3%82%B0%E3%83%A9%E3%83%9F%E3%83%B3%E3%82%B0%E3%81%AE%E5%9F%BA%E7%A4%8E%E3%81%A8%E3%82%B7%E3%83%AA%E3%82%A2%E3%83%AB%E3%83%A2%E3%83%8B%E3%82%BF%E3%83%BC/)です。

## シリアル通信を行う
初めの一歩として次のようなプログラミングを行います。
<**シリアル通信**(ケーブルを使った通信)>
接続したArduinoとPCの間でデータの通信を行います。技術的には基本的(低レベル)なデータ通信方法です。
この通信ができるということは、「ArduinoとPCがつながっています」という確認ができて、プログラムが動いていることの結果をPC上でそれを見ることができるということです。

<まとめ>
PCでArduinoの動きを確認するためにPCと接続して通信の結果をPCに表示するということです。

というわけで、細かいところを見ていきます。

## Arduino IDEの使用
【前提】
* スケッチ:プログラムを書くためのファイル
* Arduino IDEを開くと下のように開発するためのフォルダ構成が作られます。
 ![](http://zenryokuservice.com/wp/wp-content/uploads/2021/08/ArduinoIDE2.png)
![](http://zenryokuservice.com/wp/wp-content/uploads/2021/08/ArduinoIDE1.png)
* この構成と呼んだものは単純にフォルダがあるだけです、必要なものはこの場所に作成されます。
* 作成したものは最終的にArduinoに書き込まれます。

## 実装(コードを書く)
参考サイトにあるコードをとりあえず書いてみます。
どのプログラミングでもまずは、動くコードを書き写して、それから実行、書いている内容を理解するというような順序で学習していきます。

これになれると、プログラミングの学習も早くなり、最終的には、どの言語でも大体読めるようになってきます。

### 写経(書き写し)した内容
```clang
int counter = 0; // counterという名前の変数を用意して、0をセットする

void setup() {
// 起動後、この中の内容が上から順に1回実行される
Serial.begin(115200); // シリアル通信の準備をする
while (!Serial); // 準備が終わるのを待つ
Serial.println("プログラム開始"); // シリアル通信でメッセージをPCに送信

// 最後まで実行された後はloop関数に移行する
}

void loop() {
// setup関数が終了すると、この中の内容が上から順に何度も実行されつづける

Serial.print("カウンターの値 "); // シリアル通信でメッセージをPCに送信
Serial.println(counter); // シリアル通信でカウンターの値をPCに送信
counter = counter + 1; // カウンターの値を1増やす
delay(1000); // 1000ミリ秒(1秒)待機

// 最後まで実行された後はloop関数の先頭に戻る
}
```
これが書けたら、IDEから検証ボタンを押下して動くかどうかテストします。
![](http://zenryokuservice.com/wp/wp-content/uploads/2021/08/ArduinoIDE3.png)

これでコードがうまくコンパイル出来たら、動かす準備はOKです。

ちなみに「コンパイル」というのは、プログラムコードを機械語に変換する処理のことです。

# TFT LCDディスプレイを表示する
[こちらのサイト](https://ht-deko.com/arduino/shield_tftlcd.html)にあるようなものを使用しました。
このタイプのものは、Arduinoに直接続々出来るようで、GPIOピンを直接かぶせるように接続できました。

そして、参考にしたのは[こちらのサイト](https://learn.adafruit.com/2-8-tft-touch-shield/overview)です。このサイトにはTFTLCD touch shieldを使用した操作、実行方法の手順がかいてありました。
あと、下のような注意があったのでこれも注意します。
![](http://zenryokuservice.com/wp/wp-content/uploads/2021/08/TFTLCD1.png)

早速進めることにしますが、以下の手順を行いました。
1. ArduinoIDEでライブラリをインストールする
* Adafruit GFX library
* Adafruit TFTLCD library
2. プログラムコードを修正する
* Adafruit_TFTLCD.h

### 具体的にどうやったか?
ライブラリがインストールした前提で話を進めます。
下のように、ドキュメントフォルダの下に「Arduino」フォルダがあるのでその下に入っていきます。
![](http://zenryokuservice.com/wp/wp-content/uploads/2021/08/TFTLCD2.png)

この様に入っていき「Adafruit_TFTLCD.h」というファイルがあるのでそのファイルにある
> //#define USE_ADAFRUIT_SHIELD_PINOUT

と書いてある部分を修正して、次のようにします。
> #define USE_ADAFRUIT_SHIELD_PINOUT

具体的には、下のようなコードになっています。
```clang
// IMPORTANT: SEE COMMENTS @ LINE 15 REGARDING SHIELD VS BREAKOUT BOARD USAGE.

// Graphics library by ladyada/adafruit with init code from Rossum
// MIT license

#ifndef _ADAFRUIT_TFTLCD_H_
#define _ADAFRUIT_TFTLCD_H_

#if ARDUINO >= 100
#include "Arduino.h"
#else
#include "WProgram.h"
#endif

#include <Adafruit_GFX.h>

// **** IF USING THE LCD BREAKOUT BOARD, COMMENT OUT THIS NEXT LINE. ****
// **** IF USING THE LCD SHIELD, LEAVE THE LINE ENABLED: ****

// この部分を修正しました。
#define USE_ADAFRUIT_SHIELD_PINOUT 1

class Adafruit_TFTLCD : public Adafruit_GFX {

public:
Adafruit_TFTLCD(uint8_t cs, uint8_t cd, uint8_t wr, uint8_t rd, uint8_t rst);
Adafruit_TFTLCD(void);

void begin(uint16_t id = 0x9325);
void drawPixel(int16_t x, int16_t y, uint16_t color);
void drawFastHLine(int16_t x0, int16_t y0, int16_t w, uint16_t color);
void drawFastVLine(int16_t x0, int16_t y0, int16_t h, uint16_t color);
void fillRect(int16_t x, int16_t y, int16_t w, int16_t h, uint16_t c);
void fillScreen(uint16_t color);
void reset(void);
void setRegisters8(uint8_t *ptr, uint8_t n);
void setRegisters16(uint16_t *ptr, uint8_t n);
void setRotation(uint8_t x);
// These methods are public in order for BMP examples to work:
void setAddrWindow(int x1, int y1, int x2, int y2);
void pushColors(uint16_t *data, uint8_t len, boolean first);

uint16_t color565(uint8_t r, uint8_t g, uint8_t b),
readPixel(int16_t x, int16_t y), readID(void);
uint32_t readReg(uint8_t r);

private:
void init(),
// These items may have previously been defined as macros
// in pin_magic.h. If not, function versions are declared:
#ifndef write8
write8(uint8_t value),
#endif
#ifndef setWriteDir
setWriteDir(void),
#endif
#ifndef setReadDir
setReadDir(void),
#endif
#ifndef writeRegister8
writeRegister8(uint8_t a, uint8_t d),
#endif
#ifndef writeRegister16
writeRegister16(uint16_t a, uint16_t d),
#endif
writeRegister24(uint8_t a, uint32_t d),
writeRegister32(uint8_t a, uint32_t d),
#ifndef writeRegisterPair
writeRegisterPair(uint8_t aH, uint8_t aL, uint16_t d),
#endif
setLR(void), flood(uint16_t color, uint32_t len);
uint8_t driver;

#ifndef read8
uint8_t read8fn(void);
#define read8isFunctionalized
#endif

#ifndef USE_ADAFRUIT_SHIELD_PINOUT

#ifdef __AVR__
volatile uint8_t *csPort, *cdPort, *wrPort, *rdPort;
uint8_t csPinSet, cdPinSet, wrPinSet, rdPinSet, csPinUnset, cdPinUnset,
wrPinUnset, rdPinUnset, _reset;
#endif
#if defined(__SAM3X8E__)
Pio *csPort, *cdPort, *wrPort, *rdPort;
uint32_t csPinSet, cdPinSet, wrPinSet, rdPinSet, csPinUnset, cdPinUnset,
wrPinUnset, rdPinUnset, _reset;
#endif

#endif
};

// For compatibility with sketches written for older versions of library.
// Color function name was changed to 'color565' for parity with 2.2" LCD
// library.
#define Color565 color565

#endif
```

そして、書き込み開始!!!

しかしエラー!

原因は何か?

出力ポートを間違えていました。「Arduino」と書いてあるポートを選択しましょう。

追伸:電源はUSB電源ではなくDC電源を使用しないとディスプレイは移りませんでした。。。。

でわでわ。。。
JavaME 環境調査 ~JavaでIOTを始める~

イントロダクション

JavaでIOTをやりたいと思いラズパイなど色々とちゃくしゅしてみましたが、なかなかに良いものが見つかりませんでした。
現状、実行しているのは、以下のものです。

  1. ラズパイにEJDKインストール
  2. ラズパイ上で動くJavaFXでユーチューブプレーヤー

JavaでIOT

まずは、Java MEに対する理解が全然ないので、調査します。目的は、「Java MEはどのデバイスで使用可能か?」を明確にすることです。

Java MEテクノロジー

JavaMEテクノロジーに関しては、左のリンクからOracleのページに行けば見れます。
このページを参考に調査していきます。

Java MEプラットフォームは以下のコンフィグレーションに分けれらるようです。

使用できるデバイス

  1. Arm(ラズパイ、Arduinoなど色々とある)
  2. 小型デバイス

Arnに関しては、有名なので詳細は割愛します。

そして問題の「小型デバイス」に関しては、調査結果を記載します。

実行環境(OS)の一覧(一部)

  1. MIDP for Palm OSというものがあり、携帯端末で使用することが多いようです。(ちょっと古い)
  2. ITRON
  3. VxWorks
  4. LynxOS
  5. QNX
  6. Enea
  7. Android
  8. Symbian OS
  9. iOS(英語)

調べた結果

JavaMEにはコンフィグレーションによって使用できる環境が変わってくる

  1. 小型デバイス向けコンフィギュレーション - Connected Limited Device Configuration (CLDC)※KVMは数十バイトのメモリでも起動可能
  2. 多機能デバイスとスマートフォン向けコンフィギュレーション - Connected Device Configuration (CDC)
  3. コンバージドサービス用 Java ME プラットフォーム(ネットワーク接続が途切れがちな小型の制限デバイスからオンライン機能をもつモバイルデバイスまで、すべてを対象)

上記のような、分類になっていて、組み込み系システムにも十分行けるようです。KVM(CLDC)に関しても通常のマイコンで起動できそうです。

つまるところ、電子部品を調べて使用可能かどうか?というところから始めればOKというところです。

普通に電子工作するときは電子部品の調査から始めるそうです。

Java Card

参考にするページはオラクルのホームページです。

まずは、実装されているもの、現実に製品化されているものは何か?というところで、以下のようなものがあります。

これらの指輪には、Java Cardのテクノロジーで実装されたアプリがインストールされています。

この部分で、気になるのが、実装方法です。
この部分は、調査が必要ですが、開発ツールはこちらのリンクからダウンロードすることができます。まだまだ調査が必要です。。。

中途半端ですが、

こんなところで失礼します。

でわでわ。。。

Bluetooth受信サーバーを作る〜 MicrobitからのBluetooth通信: JavaME(SDK)インストール〜

ラズパイ(RPi)でMicrobitからのBluetooth経由でのデータ(ボタン押下、メッセージなど)を受信するために、以下の準備をします。

Javaサーバーを立ててモニョモニョやろうと考えているのですが。。。具体的には、MIDIメッセージをMIDI音源に送信して音を鳴らす。ということ考えています。

イメージとしてはこんな感じです。

Bluetooth通信

MIcrobitからのBluetooth通信を行うのには、リンク先のサイトを参考にしてみるとBluetoothサービスを使用してやるようです。

そして、問題のJavaサーバー側を実装しようと思い色々と調べていたら。。。

Mavenを使おう(失敗)

上のような考えに至りました。理由は以下の通りです。

使用できるAPIをMaven(Gladleなど)でインストールして実行したほうが早い

そして、以下のライブラリをダウンロード(POM使用)します。
詳細に関してはこちらのリンクを参照してください。POMファイルにコピペできます。

  1. blueCove
  2. javax.microedition: midpの方はビルドエラー

調べてみると、2の方はJavaMEのライブラリのようでした。
つまりは、JavaMEで開発しましょうという事になりました(笑)

JavaME

調べてみると、開発するOSに依存するようです。(まぁそうなるよなぁ。。。)なので開発するのにはライブラリなどまとまったものをインストールするほうが楽だろうという判断に至りました。

調べた結果

色々調べて見たらMacOSでやる場合は、自分の描いているようにPCで開発、テスト、実機へデプロイと言うのができないようです。。。。
J2ME開発をやるならばWindowsで。。。と言うとこ炉に至りました。

以下は調べて見た結果です。

NetBeensで環境構築はWindowsのみ

以下は失敗した記事です。結局はNetBeensを使用してやるのが良いとなりました。

なので、以下の環境で開発する方向でやる事にします。

  1. Exlipseのプラグインを使用する
  2. PC(Mac)上で作成したものをラズパイにインストールする、もしくはソースをラズパイでPULLしてコンパイル、実行ファイル作成

上のような方法で開発する方向で行こうと思います。
なので、以下の手順で行います。

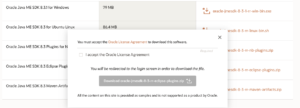
  1. ここのページからEclipseプラグイン(JavaME SDK)をダウンロード
  2. Eclipseにプラグインを追加する

Macの場合はEclipseでやらないほうが良い

サポートされているのがv3.0までのようで。。。
そんなわけで以前使っていたIntelliJ IDEAを使用してやろうと思います。
しかし、調査が先になります。
とりあえずMac版をダウンロードします。

そして、オープンソースな方を選びます。

そして、APPストア以外のインストールなので、ファインダーから開き、右クリック(controlボタンを押しながら)して開きます。
最終的にはこんな感じでJ2MEのプラグインをインストールしました。


以下失敗したものです

理解するまでに時間がかかりましたが。。。
どうやら上のプラグイン(SDK)をインストールする事で、Mavenのエラーを解消できたみたいです。なので下のような実装をしてもビルドエラーが出なくなりました。

import java.io.IOException;

import javax.bluetooth.L2CAPConnection;
import javax.bluetooth.L2CAPConnectionNotifier;
import javax.microedition.io.Connector;

/**
 * BluetoothAPIを使用して実装する。
 * @author takunoji
 * 
 * 2019/10/06
 */
public class Main {
    public static void main(String[] args) {
        try {
            L2CAPConnectionNotifier server = (L2CAPConnectionNotifier)
            Connector.open("btl2cap://localhost:3B9FA89520078C303355AAA694238F08;name=L2CAP Server1");
            L2CAPConnection cliCon = (L2CAPConnection)server.acceptAndOpen();
        } catch (IOException e) {
            /* Handle the failure to setup a connection. */
        }
    }
}

参考にしたものはJSR82のソースの入ったZIPファイルをダウンロードした時に付いていたPDFにあるソースです。
そして、プラグイン(SDK)をインストールした時に名前が一致しなかったので、インストールしたものを下に記載しておきます。

まとめ

今までやったことを整理して、まとめます。
正しい作業フローは以下のようになります。

  1. プラグイン(SDK)をEclipseにインストールする
  2. MavenでBluetoothAPI(BlueCove, javax.microeditionなど)をインストールする(POMファイル使用)

作成したPOMファイルは以下のようなものができました。

<project xmlns="http://maven.apache.org/POM/4.0.0" xmlns:xsi="http://www.w3.org/2001/XMLSchema-instance"
  xsi:schemaLocation="http://maven.apache.org/POM/4.0.0 http://maven.apache.org/maven-v4_0_0.xsd">
  <modelVersion>4.0.0</modelVersion>
  <groupId>zenryokuservice</groupId>
  <artifactId>socket.server</artifactId>
  <version>0.0.1-SNAPSHOT</version>

  <properties>
      <java.version>1.8</java.version>
      <maven.compiler.target>${java.version}</maven.compiler.target>
      <maven.compiler.source>${java.version}</maven.compiler.source>
  </properties>  

  <repositories>
    <repository>
      <id>microedition</id>
      <name>microedition</name>
      <url> https://mvnrepository.com/artifact/javax.microedition/midp</url>
    </repository>
    <repository>
      <id>microemu-extensions</id>
      <name>jsr82</name>
      <url>https://mvnrepository.com/artifact/org.microemu/microemu-jsr-82</url>
    </repository>
    <repository>
      <id>bluecove</id>
      <name>bluecove</name>
      <url>https://mvnrepository.com/artifact/net.sf.bluecove/bluecove</url>
    </repository>
  </repositories>

  <dependencies>
    <dependency>
        <groupId>org.microemu</groupId>
        <artifactId>microemu-jsr-82</artifactId>
        <version>2.0.4</version>
    </dependency>
    <dependency>
      <groupId>junit</groupId>
      <artifactId>junit</artifactId>
      <version>4.11</version>
      <scope>test</scope>
    </dependency>
    <dependency>
      <groupId>net.sf.bluecove</groupId>
      <artifactId>bluecove</artifactId>
      <version>2.1.0</version>
    </dependency>
  </dependencies>
  <build>
   <plugins>
    <plugin>
      <artifactId>maven-assembly-plugin</artifactId>
      <configuration>
        <archive>
          <manifest>
            <addClasspath>true</addClasspath>
            <mainClass>zenryokuservice.socket.server.SocketServerBasic</mainClass>
            <classpathPrefix>dependency-jars/</classpathPrefix>
          </manifest>
          </archive>
          <descriptorRefs>
            <descriptorRef>jar-with-dependencies</descriptorRef>
          </descriptorRefs>
      </configuration>
      <executions>
        <execution>
          <id>make-assembly</id> <!-- this is used for inheritance merges -->
          <phase>package</phase> <!-- bind to the packaging phase -->
          <goals>
            <goal>single</goal>
          </goals>
        </execution>
      </executions>
    </plugin>
    <plugin>
      <groupId>org.apache.maven.plugins</groupId>
      <artifactId>maven-dependency-plugin</artifactId>
      <version>2.5.1</version>
      <executions>
        <execution>
          <id>copy-dependencies</id>
          <phase>package</phase>
          <goals>
          <goal>copy-dependencies</goal>
          </goals>
          <configuration>
           <outputDirectory>
             ${project.build.directory}/dependency-jars/
           </outputDirectory>
          </configuration>
         </execution>
       </executions>
     </plugin>
   </plugins>
  </build>
</project>

java bluetooth API 〜ラズパイでbluetooth通信の実装を試みる〜

マイクロビットからラズパイ経由でMIDI音源を鳴らすことを目標にしています。イメージ図は下のようなものです。

今回はここのMicrobitからラズパイ(RPi)へデータを飛ばした時にラズパイで受け取るための装置を作ろうと思っています。

Bluetooth通信

ラズパイ上でBluetooth通信をしたいと思い、色々と調べているとこのようなページを見つけました。
ここにはBlueCoveというライブラリを使用してラズパイでJavaを起動してBluetooth通信を行う時につまづいたのでなにやらとやり取りをしている掲示板でした。
早い話が、BlueCoveをつかえばBluetoothを使用できそうだということです。がしかしプロジェクトは終了しているのか、メインプロジェクト

JSR-82

上のような規格(仕様)があります、大雑把に、Bluetooth通信の仕様を決めているものです。上のリンク先がJSR-82のサイトになります。JSR 82: JavaTM APIs for Bluetooth

そして、JavaTM APIs for Bluetoothのページからダウンロードできるようです。しかし、色々あってよくわからな買ったので最後に行き着いたとこのリンクをここに貼っておきます。
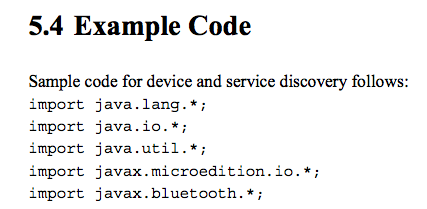
zipファイルにjavax.bluetooth.*が入っていました。そして下にあるサンプルコードが記載されているPDFファイルも入っているのでそれも参照します。

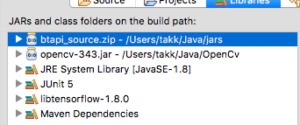
このZIPファイルをダウンロードして、Eclipseの設定からビルドパスに追加します。

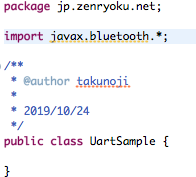
そうすると下のように「javax.bluetooth.*」をインポートでいます。

ここからがBluetoothとの戦いが始まります。そして、これはクライアントアプリのサンプルコードです。
目的の実装はサーバー側の実装になりますが、入り口(イントロダクション)的に下に記載します。

Bluetoothサンプルコード

ちょうどダウンロードしたZIPに(上のZIPファイルに)PDFファイルが入っていましたので、ここに記載します。(コピペです)
こいつ(サンプルコード)を参考にBluetooth通信を試みます。
<とりあえずはクライアント側の実装です。>

import java.lang.*;
import java.io.*;
import java.util.*;
import javax.microedition.io.*;
import javax.bluetooth.*;
/**
* This class shows a simple client application that performs device
* and service
* discovery and communicates with a print server to show how the Java * API for Bluetooth wireless technology works.
*/
public class PrintClient implements DiscoveryListener {
/**
* The DiscoveryAgent for the local Bluetooth device. */
    private DiscoveryAgent agent;
/**
* The max number of service searches that can occur at any one time. */
    private int maxServiceSearches = 0;
/**
* The number of service searches that are presently in progress. */
    private int serviceSearchCount;
/**
* Keeps track of the transaction IDs returned from searchServices. */
    private int transactionID[];
/**
* The service record to a printer service that can print the message
 April 5, 2002 Java APIs for Bluetooth Wireless Technology (JSR-82)
21
ALL RIGHTS RESERVED UNDER JSPA (JAVA SPECIFICATION PARTICIPATION AGREEMENT)
 * provided at the command line.
 */
private ServiceRecord record;
/**
* Keeps track of the devices found during an inquiry. */
private Vector deviceList;
/**
* Creates a PrintClient object and prepares the object for device
* discovery and service searching.
*
* @exception BluetoothStateException if the Bluetooth system could not be * initialized
*/
public PrintClient() throws BluetoothStateException {
/*
* Retrieve the local Bluetooth device object. */
LocalDevice local = LocalDevice.getLocalDevice();
/*
* Retrieve the DiscoveryAgent object that allows us to perform device * and service discovery.
*/
    agent = local.getDiscoveryAgent();
/*
* Retrieve the max number of concurrent service searches that can * exist at any one time.
*/
try {
maxServiceSearches = Integer.parseInt(
LocalDevice.getProperty("bluetooth.sd.trans.max")); } catch (NumberFormatException e) {
System.out.println("General Application Error");
System.out.println("\tNumberFormatException: " + e.getMessage()); }
transactionID = new int[maxServiceSearches];
    // Initialize the transaction list
    for (int i = 0; i < maxServiceSearches; i++) {
        transactionID[i] = -1;
    }
    record = null;
    deviceList = new Vector();
}
/**
* Adds the transaction table with the transaction ID provided. *
* @param trans the transaction ID to add to the table */
private void addToTransactionTable(int trans) {
for (int i = 0; i < transactionID.length; i++) {
        if (transactionID[i] == -1) {
            transactionID[i] = trans;
            return;
} }
}
/**
* Removes the transaction from the transaction ID table. *
* @param trans the transaction ID to delete from the table */
private void removeFromTransactionTable(int trans) { for (int i = 0; i < transactionID.length; i++) {
        if (transactionID[i] == trans) {
            transactionID[i] = -1;
            return;
} }
}
/**
* Completes a service search on each remote device in the list until all
* devices are searched or until a printer is found that this application * can print to.
*
* @param devList the list of remote Bluetooth devices to search *
* @return true if a printer service is found; otherwise false if
* no printer service was found on the devList provided */
private boolean searchServices(RemoteDevice[] devList) { UUID[] searchList = new UUID[2];
/*
* Add the UUID for L2CAP to make sure that the service record
* found will support L2CAP. This value is defined in the * Bluetooth Assigned Numbers document.
*/
    searchList[0] = new UUID(0x0100);
/*
* Add the UUID for the printer service that we are going to use to
* the list of UUIDs to search for. (a fictional printer service UUID) */
searchList[1] = new UUID("1020304050d0708093a1b121d1e1f100", false);
/*
* Start a search on as many devices as the system can support. */
    for (int i = 0; i < devList.length; i++) {
/*
* If we found a service record for the printer service, then * we can end the search.
*/
        if (record != null) {
            return true;
}
try {
int trans = agent.searchServices(null, searchList, devList[i],
                this);
            addToTransactionTable(trans);
        } catch (BluetoothStateException e) {
            /*
* Failed to start the search on this device, try another * device.
*/
}
/*
* Determine if another search can be started. If not, wait for * a service search to end.
*/
        synchronized (this) {
ALL RIGHTS RESERVED UNDER JSPA (JAVA SPECIFICATION PARTICIPATION AGREEMENT)
} }
serviceSearchCount++;
if (serviceSearchCount == maxServiceSearches) {
    try {
        this.wait();
    } catch (Exception e) {
} }
/*
* Wait until all the service searches have completed. */
    while (serviceSearchCount > 0) {
        synchronized (this) {
            try {
                this.wait();
            } catch (Exception e) {
} }
}
    if (record != null) {
        return true;
    } else {
        return false;
} }
/**
* Finds the first printer that is available to print to.
*
* @return the service record of the printer that was found; null if no * printer service was found
*/
public ServiceRecord findPrinter() {
/*
* If there are any devices that have been found by a recent inquiry,
* we don't need to spend the time to complete an inquiry. */
RemoteDevice[] devList = agent.retrieveDevices(DiscoveryAgent.CACHED); if (devList != null) {
        if (searchServices(devList)) {
            return record;
} }
/*
* Did not find any printer services from the list of cached devices.
* Will try to find a printer service in the list of pre-known * devices.
*/
devList = agent.retrieveDevices(DiscoveryAgent.PREKNOWN); if (devList != null) {
    if (searchServices(devList)) {
        return record;
} }
/*
* Did not find a printer service in the list of pre-known or cached
* devices. So start an inquiry to find all devices that could be a * printer and do a search on those devices.
*/
/* Start an inquiry to find a printer   */
try {
agent.startInquiry(DiscoveryAgent.GIAC, this);
/*
* Wait until all the devices are found before trying to start the * service search.
*/
synchronized (this) {
         try {
             this.wait();
         } catch (Exception e) {
} }
} catch (BluetoothStateException e) { System.out.println("Unable to find devices to search");
}
if (deviceList.size() > 0) {
devList = new RemoteDevice[deviceList.size()]; deviceList.copyInto(devList);
    if (searchServices(devList)) {
        return record;
ALL RIGHTS RESERVED UNDER JSPA (JAVA SPECIFICATION PARTICIPATION AGREEMENT)
} }
    return null;
}
/**
* This is the main method of this application. It will print out * the message provided to the first printer that it finds.
*
* @param args[0] the message to send to the printer
*/
public static void main(String[] args) {
    PrintClient client = null;
/*
* Validate the proper number of arguments exist when starting this * application.
*/
if ((args == null) || (args.length != 1)) { System.out.println("usage: java PrintClient message"); return;
}
    /*
     * Create a new PrintClient object.
     */
    try {
        client = new PrintClient();
} catch (BluetoothStateException e) { System.out.println("Failed to start Bluetooth System"); System.out.println("\tBluetoothStateException: " +
}
/*
 * Find a printer in the local area
 */
ServiceRecord printerService = client.findPrinter(); if (printerService != null) {
/*
* Determine if this service will communicate over RFCOMM or * L2CAP by retrieving the connection string.
e.getMessage());
ALL RIGHTS RESERVED UNDER JSPA (JAVA SPECIFICATION PARTICIPATION AGREEMENT)
*/
String conURL = printerService.getConnectionURL(
ServiceRecord.NOAUTHENTICATE_NOENCRYPT, false); int index= conURL.indexOf(':');
String protocol= conURL.substring(0, index);
if (protocol.equals("btspp")) {
/*
* Since this printer service uses RFCOMM, create an RFCOMM * connection and send the data over RFCOMM.
*/
            /* code to call RFCOMM client goes here */
        } else if (protocol.equals("btl2cap")) {
                /*
                 * Since this service uses L2CAP, create an L2CAP
                 * connection to the service and send the data to the
                 * service over L2CAP.
                 */
          /* code to call L2CAP client goes here */
} else {
System.out.println("Unsupported Protocol");
}
} else {
System.out.println("No Printer was found");
} }
/**
* Called when a device was found during an inquiry. An inquiry
* searches for devices that are discoverable. The same device may * be returned multiple times.
*
* @see DiscoveryAgent#startInquiry
*
* @param btDevice the device that was found during the inquiry *
* @param cod the service classes, major device class, and minor
* device class of the remote device being returned *
April 5, 2002 Java APIs for Bluetooth Wireless Technology (JSR-82)
28
ALL RIGHTS RESERVED UNDER JSPA (JAVA SPECIFICATION PARTICIPATION AGREEMENT)
*/
public void deviceDiscovered(RemoteDevice btDevice, DeviceClass cod) {
/*
* Since service search takes time and we are already forced to * complete an inquiry, we will not do a service
* search on any device that is not an Imaging device.
* The device class of 0x600 is Imaging as
* defined in the Bluetooth Assigned Numbers document.
*/
if (cod.getMajorDeviceClass() == 0x600) { /*
} }
* Imaging devices could be a display, camera, scanner, or * printer. If the imaging device is a printer,
* then bit 7 should be set from its minor device
* class according to the Bluetooth Assigned
 * Numbers document.
*/
if ((cod.getMinorDeviceClass() & 0x80) != 0) {
/*
* Now we know that it is a printer. Now we will verify that
* it has a rendering service on it. A rendering service may
* allow us to print. We will have to do a service search to
* get more information if a rendering service exists. If this
* device has a rendering service then bit 18 will be set in * the major service classes.
*/
if ((cod.getServiceClasses() & 0x40000) != 0) { deviceList.addElement(btDevice);
} }
/**
* The following method is called when a service search is completed or
* was terminated because of an error. Legal status values * include:
* SERVICE_SEARCH_COMPLETED,
* SERVICE_SEARCH_TERMINATED,
* SERVICE_SEARCH_ERROR,
* SERVICE_SEARCH_DEVICE_NOT_REACHABLE, and
* SERVICE_SEARCH_NO_RECORDS. *
* @param transID the transaction ID identifying the request which
 * initiated the service search
 *
* @param respCode the response code which indicates the
* status of the transaction; guaranteed to be one of the * aforementioned only
*
*/
public void serviceSearchCompleted(int transID, int respCode) {
/*
* Removes the transaction ID from the transaction table. */
removeFromTransactionTable(transID);
    serviceSearchCount--;
    synchronized (this) {
        this.notifyAll();
} }
/**
* Called when service(s) are found during a service search.
* This method provides the array of services that have been found. *
* @param transID the transaction ID of the service search that is * posting the result
*
* @param service a list of services found during the search request *
* @see DiscoveryAgent#searchServices
*/
public void servicesDiscovered(int transID, ServiceRecord[] servRecord) {
/*
* If this is the first record found, then store this record * and cancel the remaining searches.
*/
    if (record == null) {
        record = servRecord[0];
/*
* Cancel all the service searches that are presently * being performed.
*/
April 5, 2002
Java APIs for Bluetooth Wireless Technology (JSR-82)
30
ALL RIGHTS RESERVED UNDER JSPA (JAVA SPECIFICATION PARTICIPATION AGREEMENT)
} }

でわでわ。。。


java midi Hello java sound〜javax.sound.midiでハローワールド〜

今回は、JavaでMidiを扱うための実装をしていきます。やはり、初めにハローワールドをやります。これにより基本的な情報を集めます。

具体的に

<作成したテストコード>

private void printInfo(MidiDevice.Info info) {
    System.out.println("*** Name ***");
    System.out.println(info.getName());
    System.out.println("*** Vendor ***");
    System.out.println(info.getVendor());
    System.out.println("*** Description ***");
    System.out.println(info.getDescription());
}

@Test
public void testMidiCreator() {
    MidiDevice.Info[] infos = MidiSystem.getMidiDeviceInfo();
    int i = 0;
    for (MidiDevice.Info inf : infos) {
        System.out.println("*** Info" + i + " ***");
        printInfo(inf);
        i++;
    }
    System.out.println("// シーケンサ");
    // シーケンサー
    printInfo(target.getSeq().getDeviceInfo());
    System.out.println("// シンセサイザ");
    // シンセサイザ
    printInfo(target.getSynth().getDeviceInfo());
}

<テスト対象クラス(実装するクラス)>

private Sequencer seq;
private Transmitter seqTrans;
private Synthesizer synth;
private Receiver synthRcvr;

/** コンストラクタ */
public MidiCreator() {
    try {
          seq = MidiSystem.getSequencer();
          seqTrans = seq.getTransmitter();
          synth = MidiSystem.getSynthesizer();
          synthRcvr = synth.getReceiver(); 
          seqTrans.setReceiver(synthRcvr);  
    } catch (MidiUnavailableException e) {
        e.printStackTrace();
          // handle or throw exception
    }
}
/** ゲッターとセッターは省略します */

そして、実行結果

////// init //////
*** Info0 ***
*** Name ***
Gervill
*** Vendor ***
OpenJDK
*** Description ***
Software MIDI Synthesizer
*** Info1 ***
*** Name ***
Real Time Sequencer
*** Vendor ***
Oracle Corporation
*** Description ***
Software sequencer
// シーケンサ
*** Name ***
Real Time Sequencer
*** Vendor ***
Oracle Corporation
*** Description ***
Software sequencer
// シンセサイザ
*** Name ***
Gervill
*** Vendor ***
OpenJDK
*** Description ***
Software MIDI Synthesizer

これはコンソールに出力した結果です。
そして実行画像は下にあります。

これは、Microbitからのメッセージを受けてMIDI音源を鳴らすための仕組みづくりの一環です。

作成したコードはGithubにアップしています。

ちなみに、MIDIを再生する順序は以下のようになります。

MIDIの再生

  1. デバイスを読み込むMidiSystem.getSequencer();
  2. Midiファイル(*.midなど)を読み込むnew File("midiファイルへのパス");
  3. 再生するデバイスにシーケンス(MIDIファイル)をセット
    Sequence mySeq = MidiSystem.getSequence(midi);
    seq.setSequence(mySeq);
  4. 再生処理seq.start();
  5. 再生する時間分処理を停止するThread.sleep(10000);
  6. 再生処理を停止するseq.stop();

こんな感じです。
実際に処理が動いて音がなるとわかっていても感動するものがあります。

でわでわ。。。